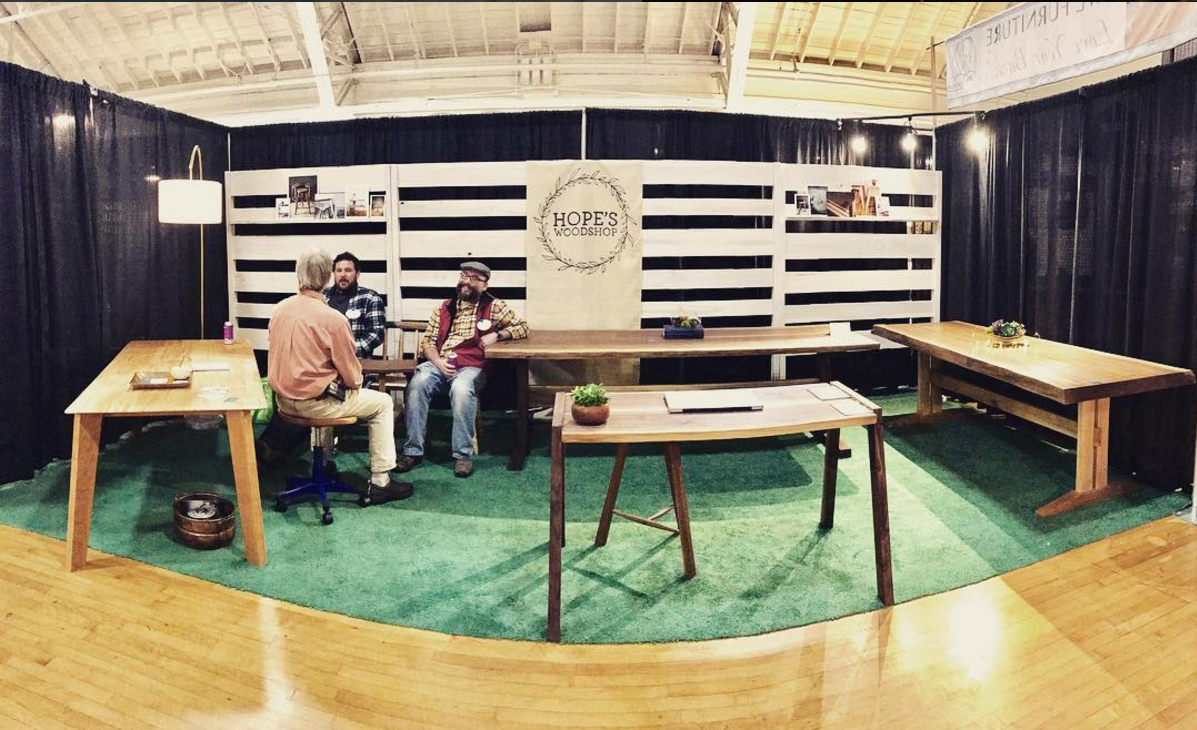
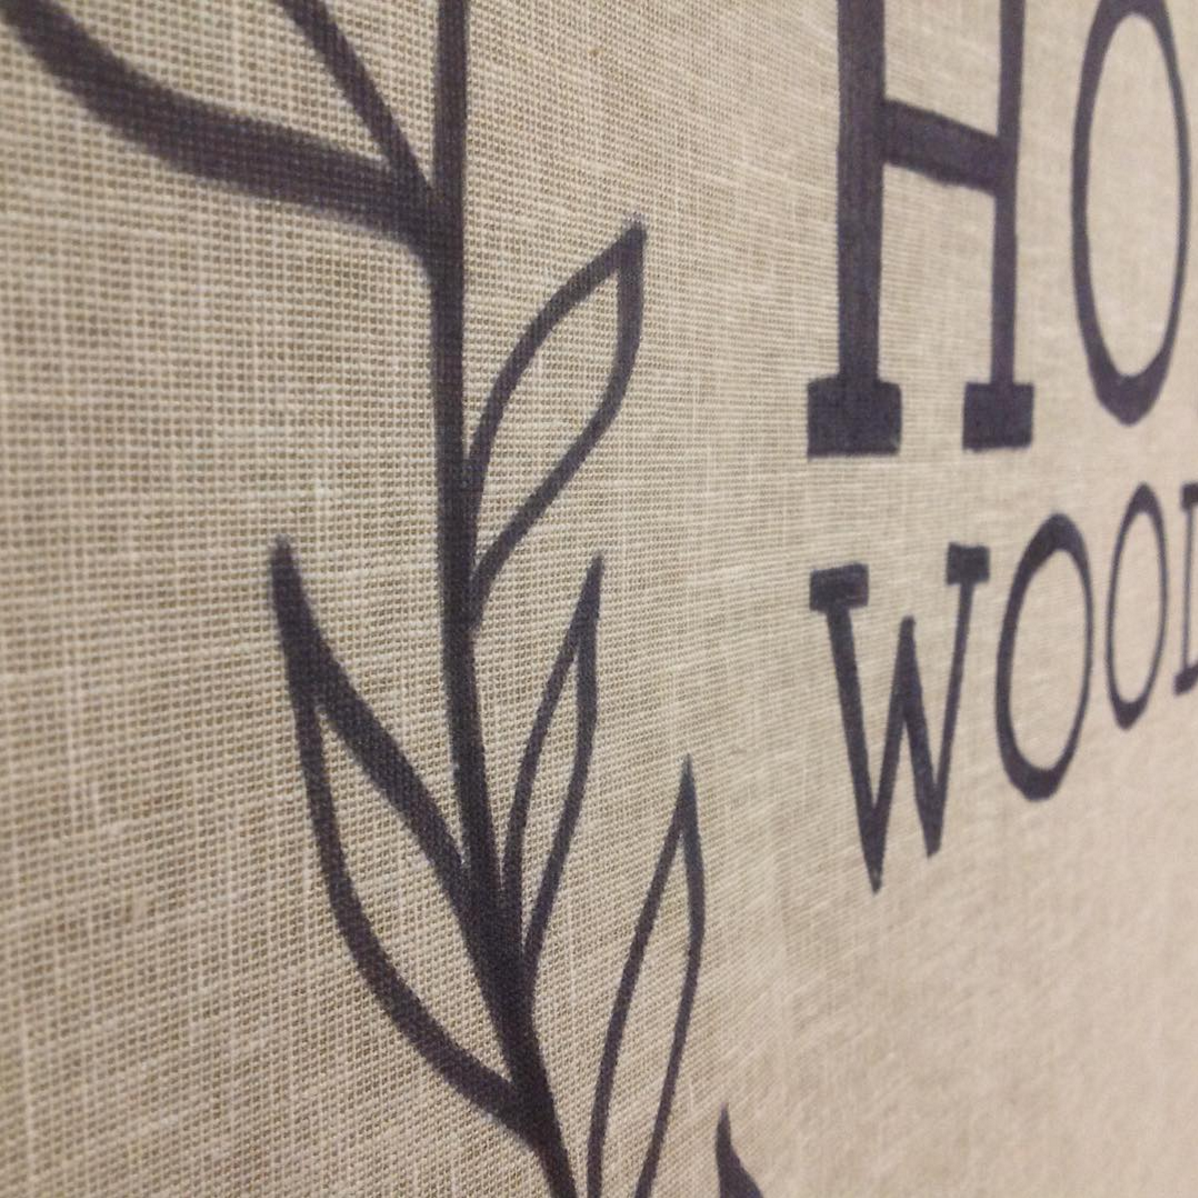
Hope's Woodshop asked me to create a fabric banner for the recent Fine Furnishings Show - I found a rough linen weave that contrasted nicely with their white wood backdrop and added an alternate version of their logo onto the center of the banner. It's been fun to see this company grow since I first created their logo years ago, and I'm excited to see how things develop for them next!
Where's My Adventure?
Here's some recent illustration work for Deeply Rooted Magazine to accompany an article called, "Where's My Adventure?" The piece was about comparing our often mundane lives with the glamorous, exciting portrayals of other people's adventures that we see through social media. The writer shared about the good that God can do in the mundane parts of life, and finding adventure in the everyday.
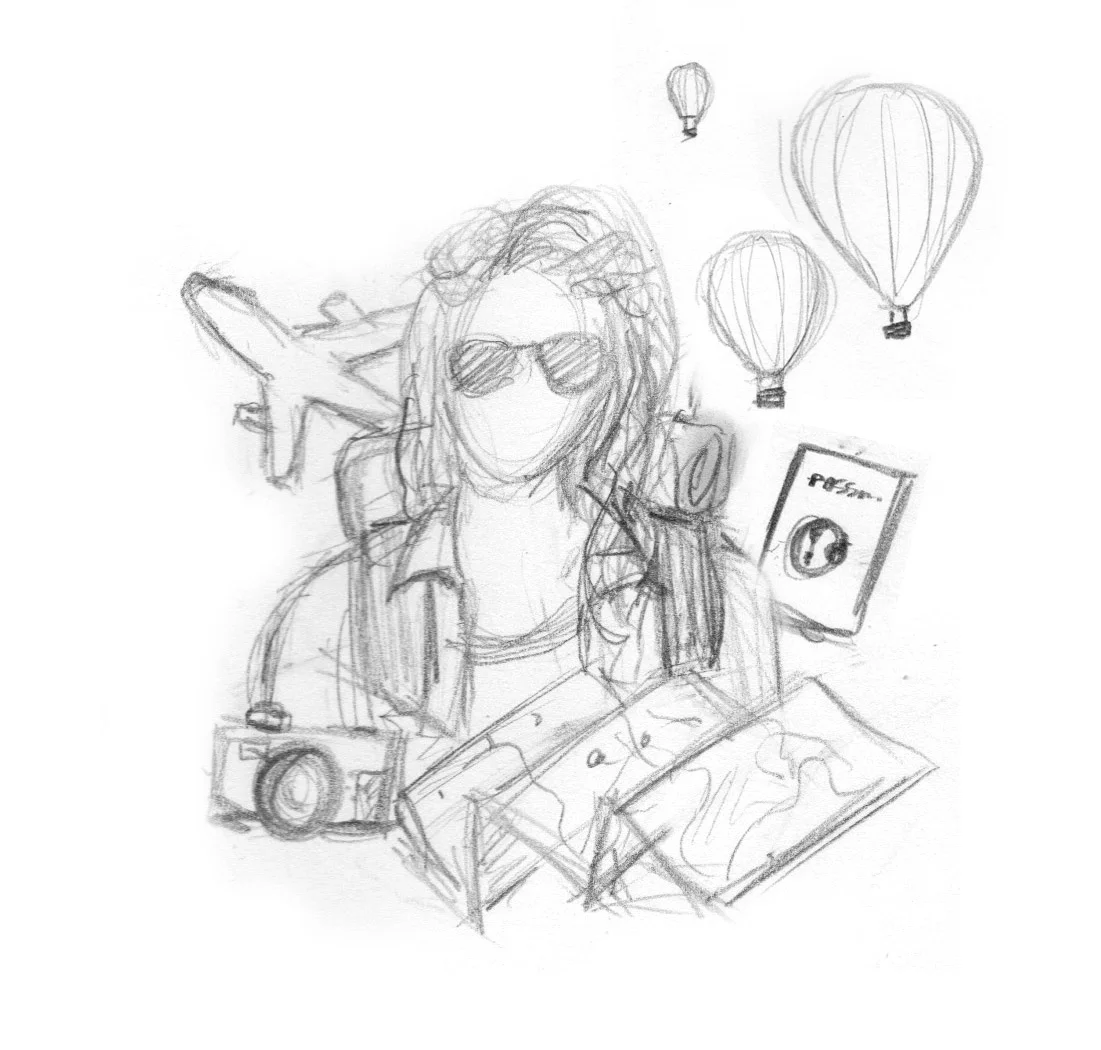
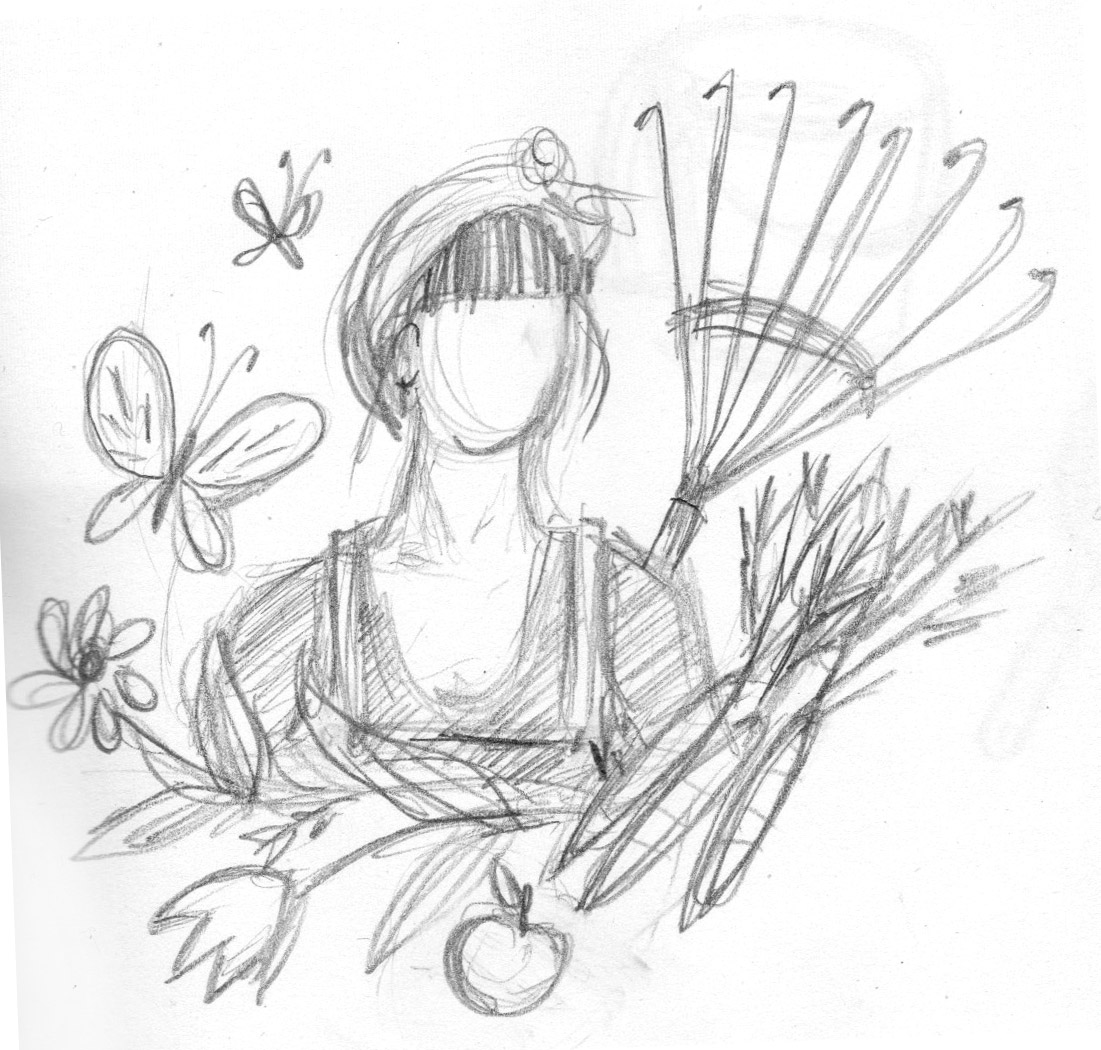

Creative Director Meghan Caughill requested a collage-style illustration featuring faceless portraits and little details to portray the lives of different women. I loved the concept and chose to combine my three favorite techniques to create these images: pencil drawing, fabric collage, and stitching.
Meghan also incorporated some of my stitched lines into the final layout (see below). I really enjoyed working on this project - thank you to the Deeply Rooted team for including me in this issue!
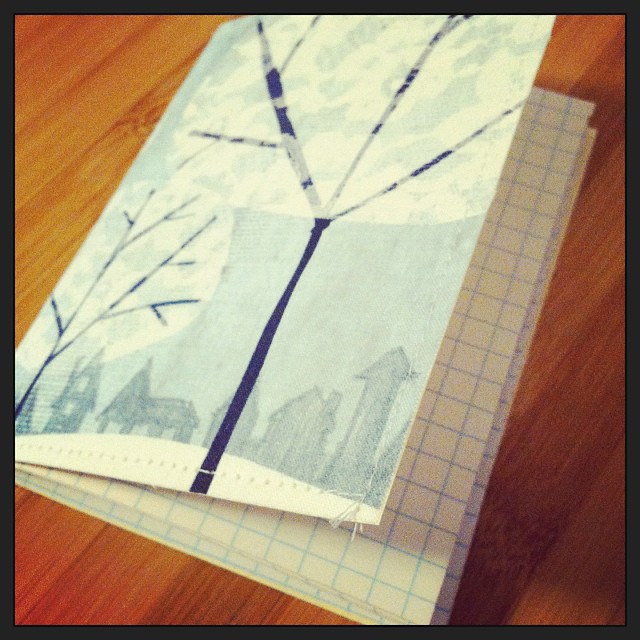
Currently stitching...
Trying out some new ideas today, like this little fabric covered sketchbook with stitched detail.
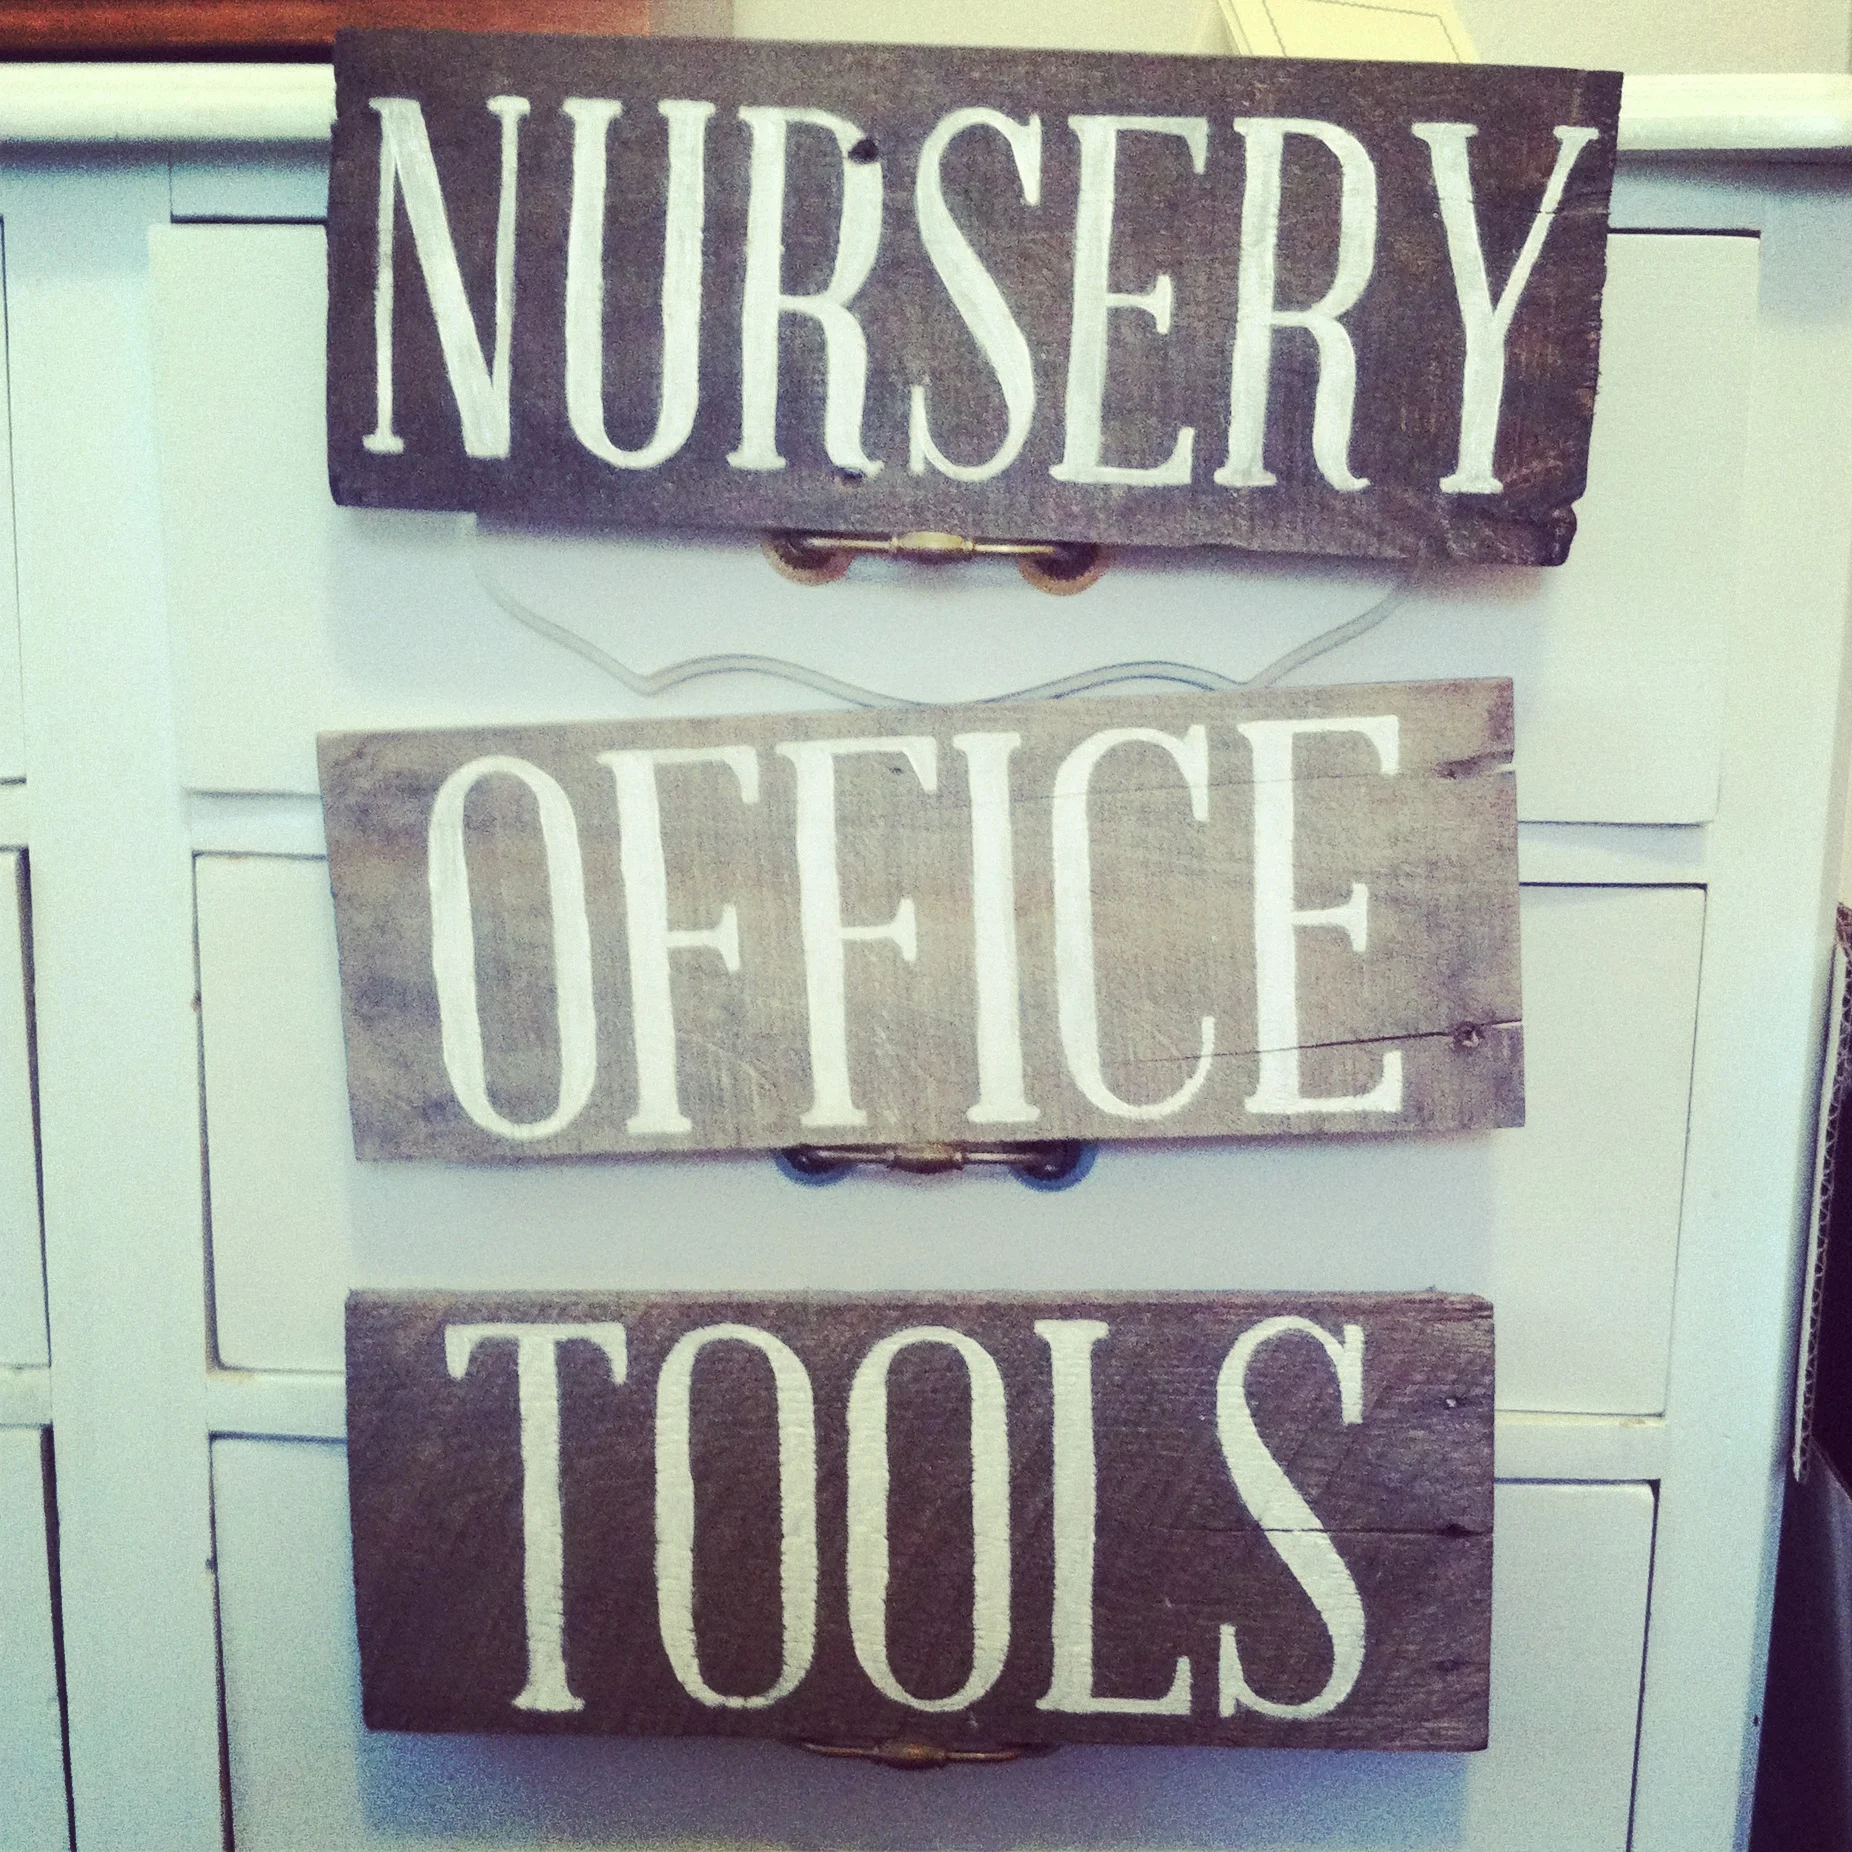
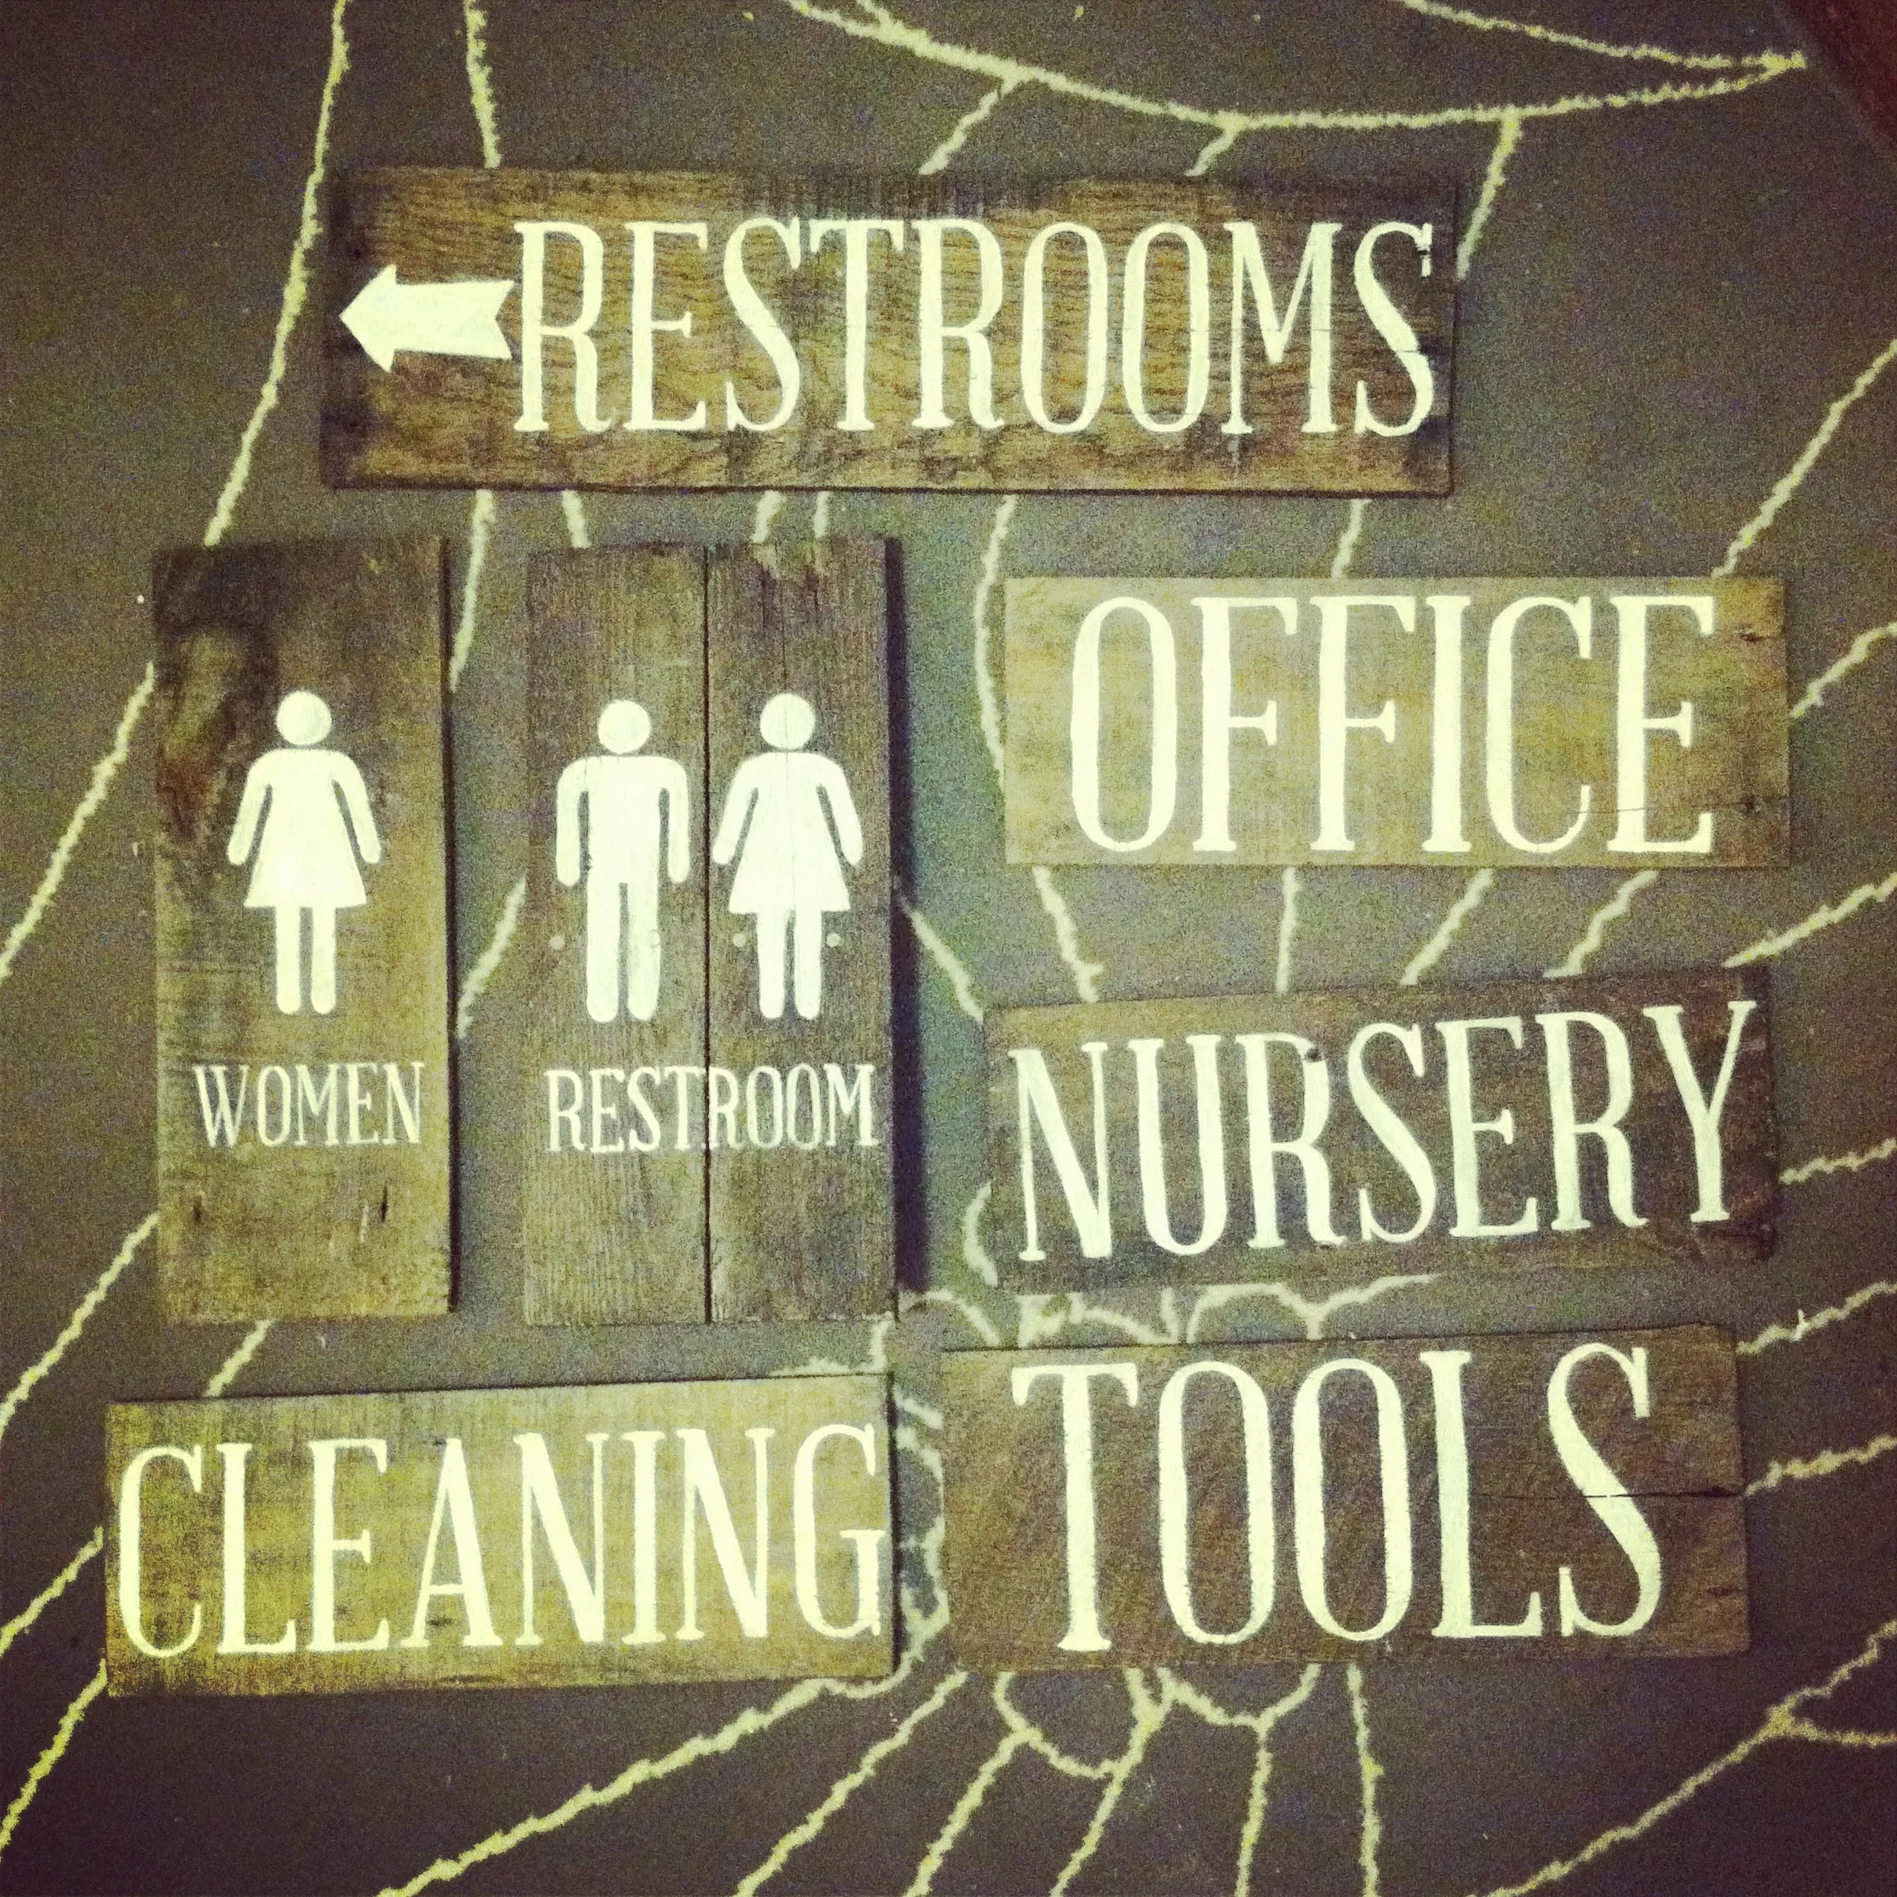
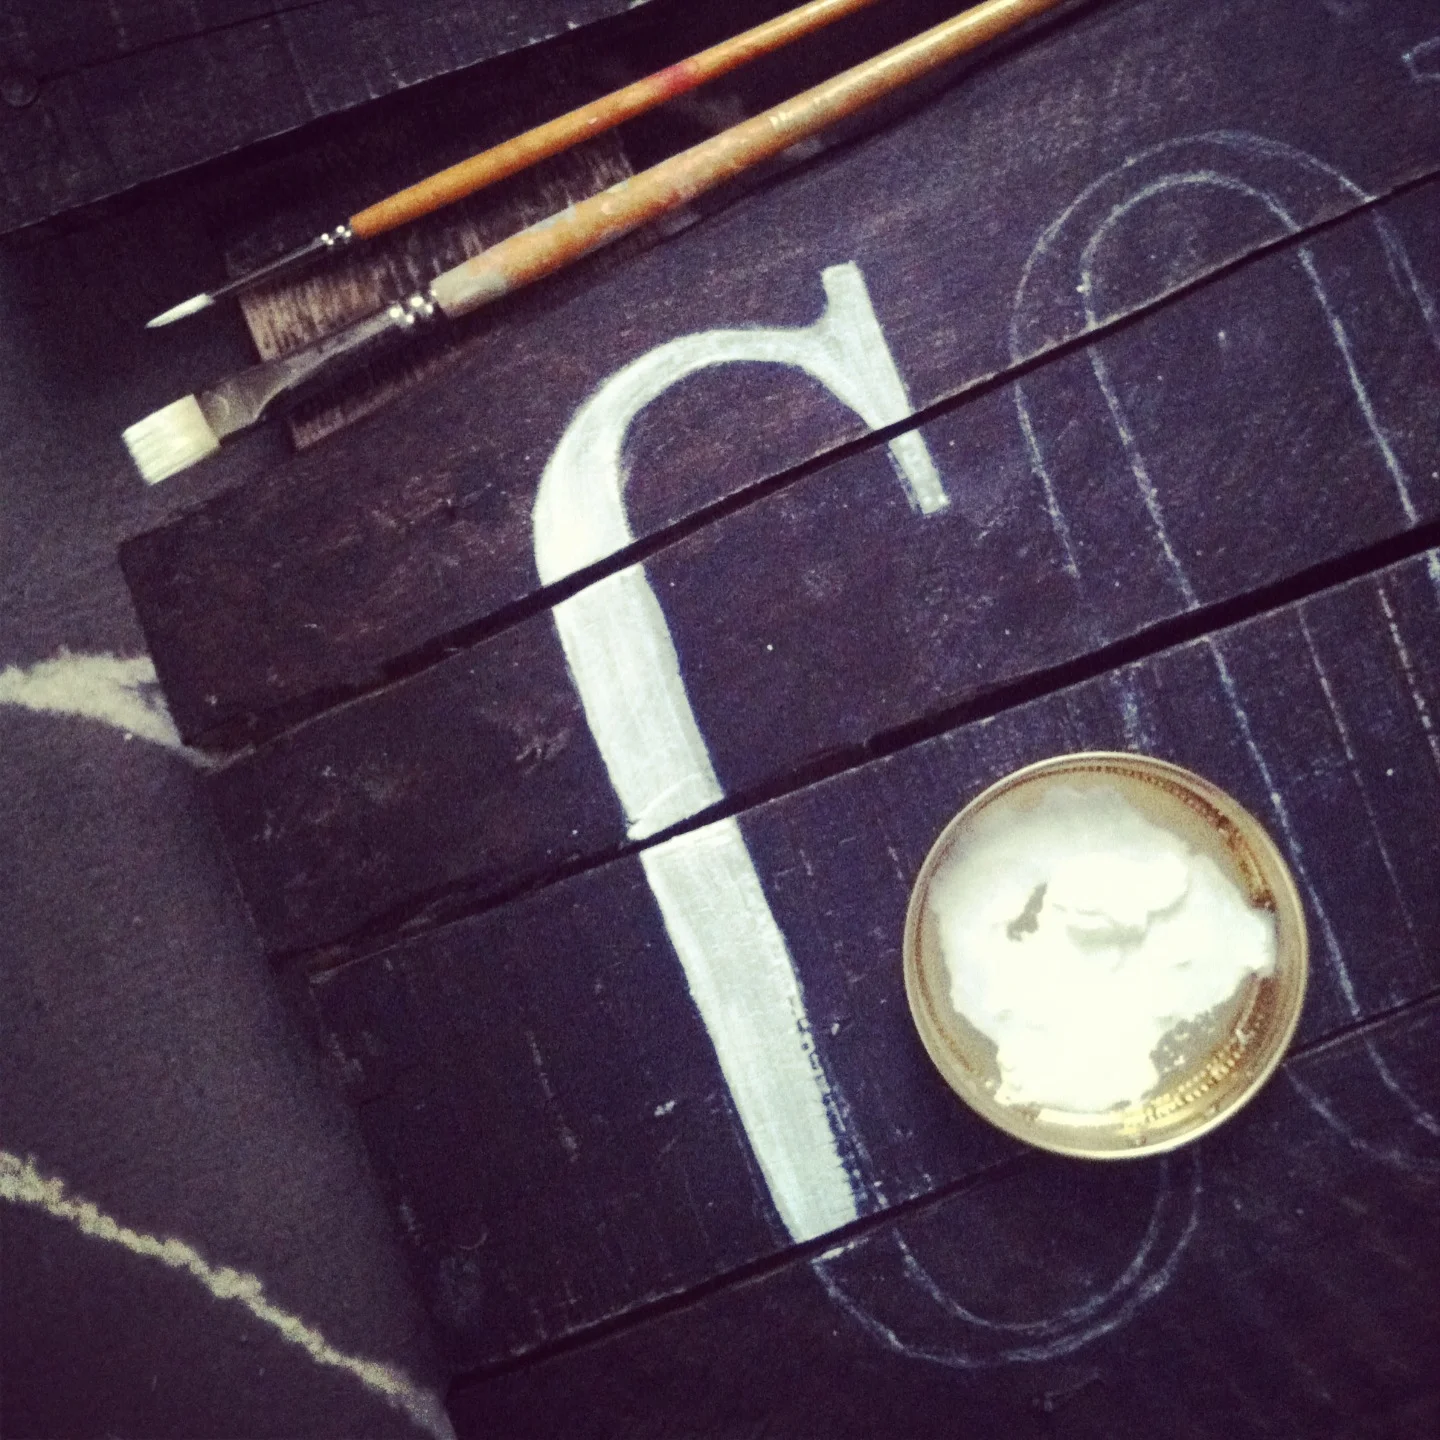
Painted Wooden Signs
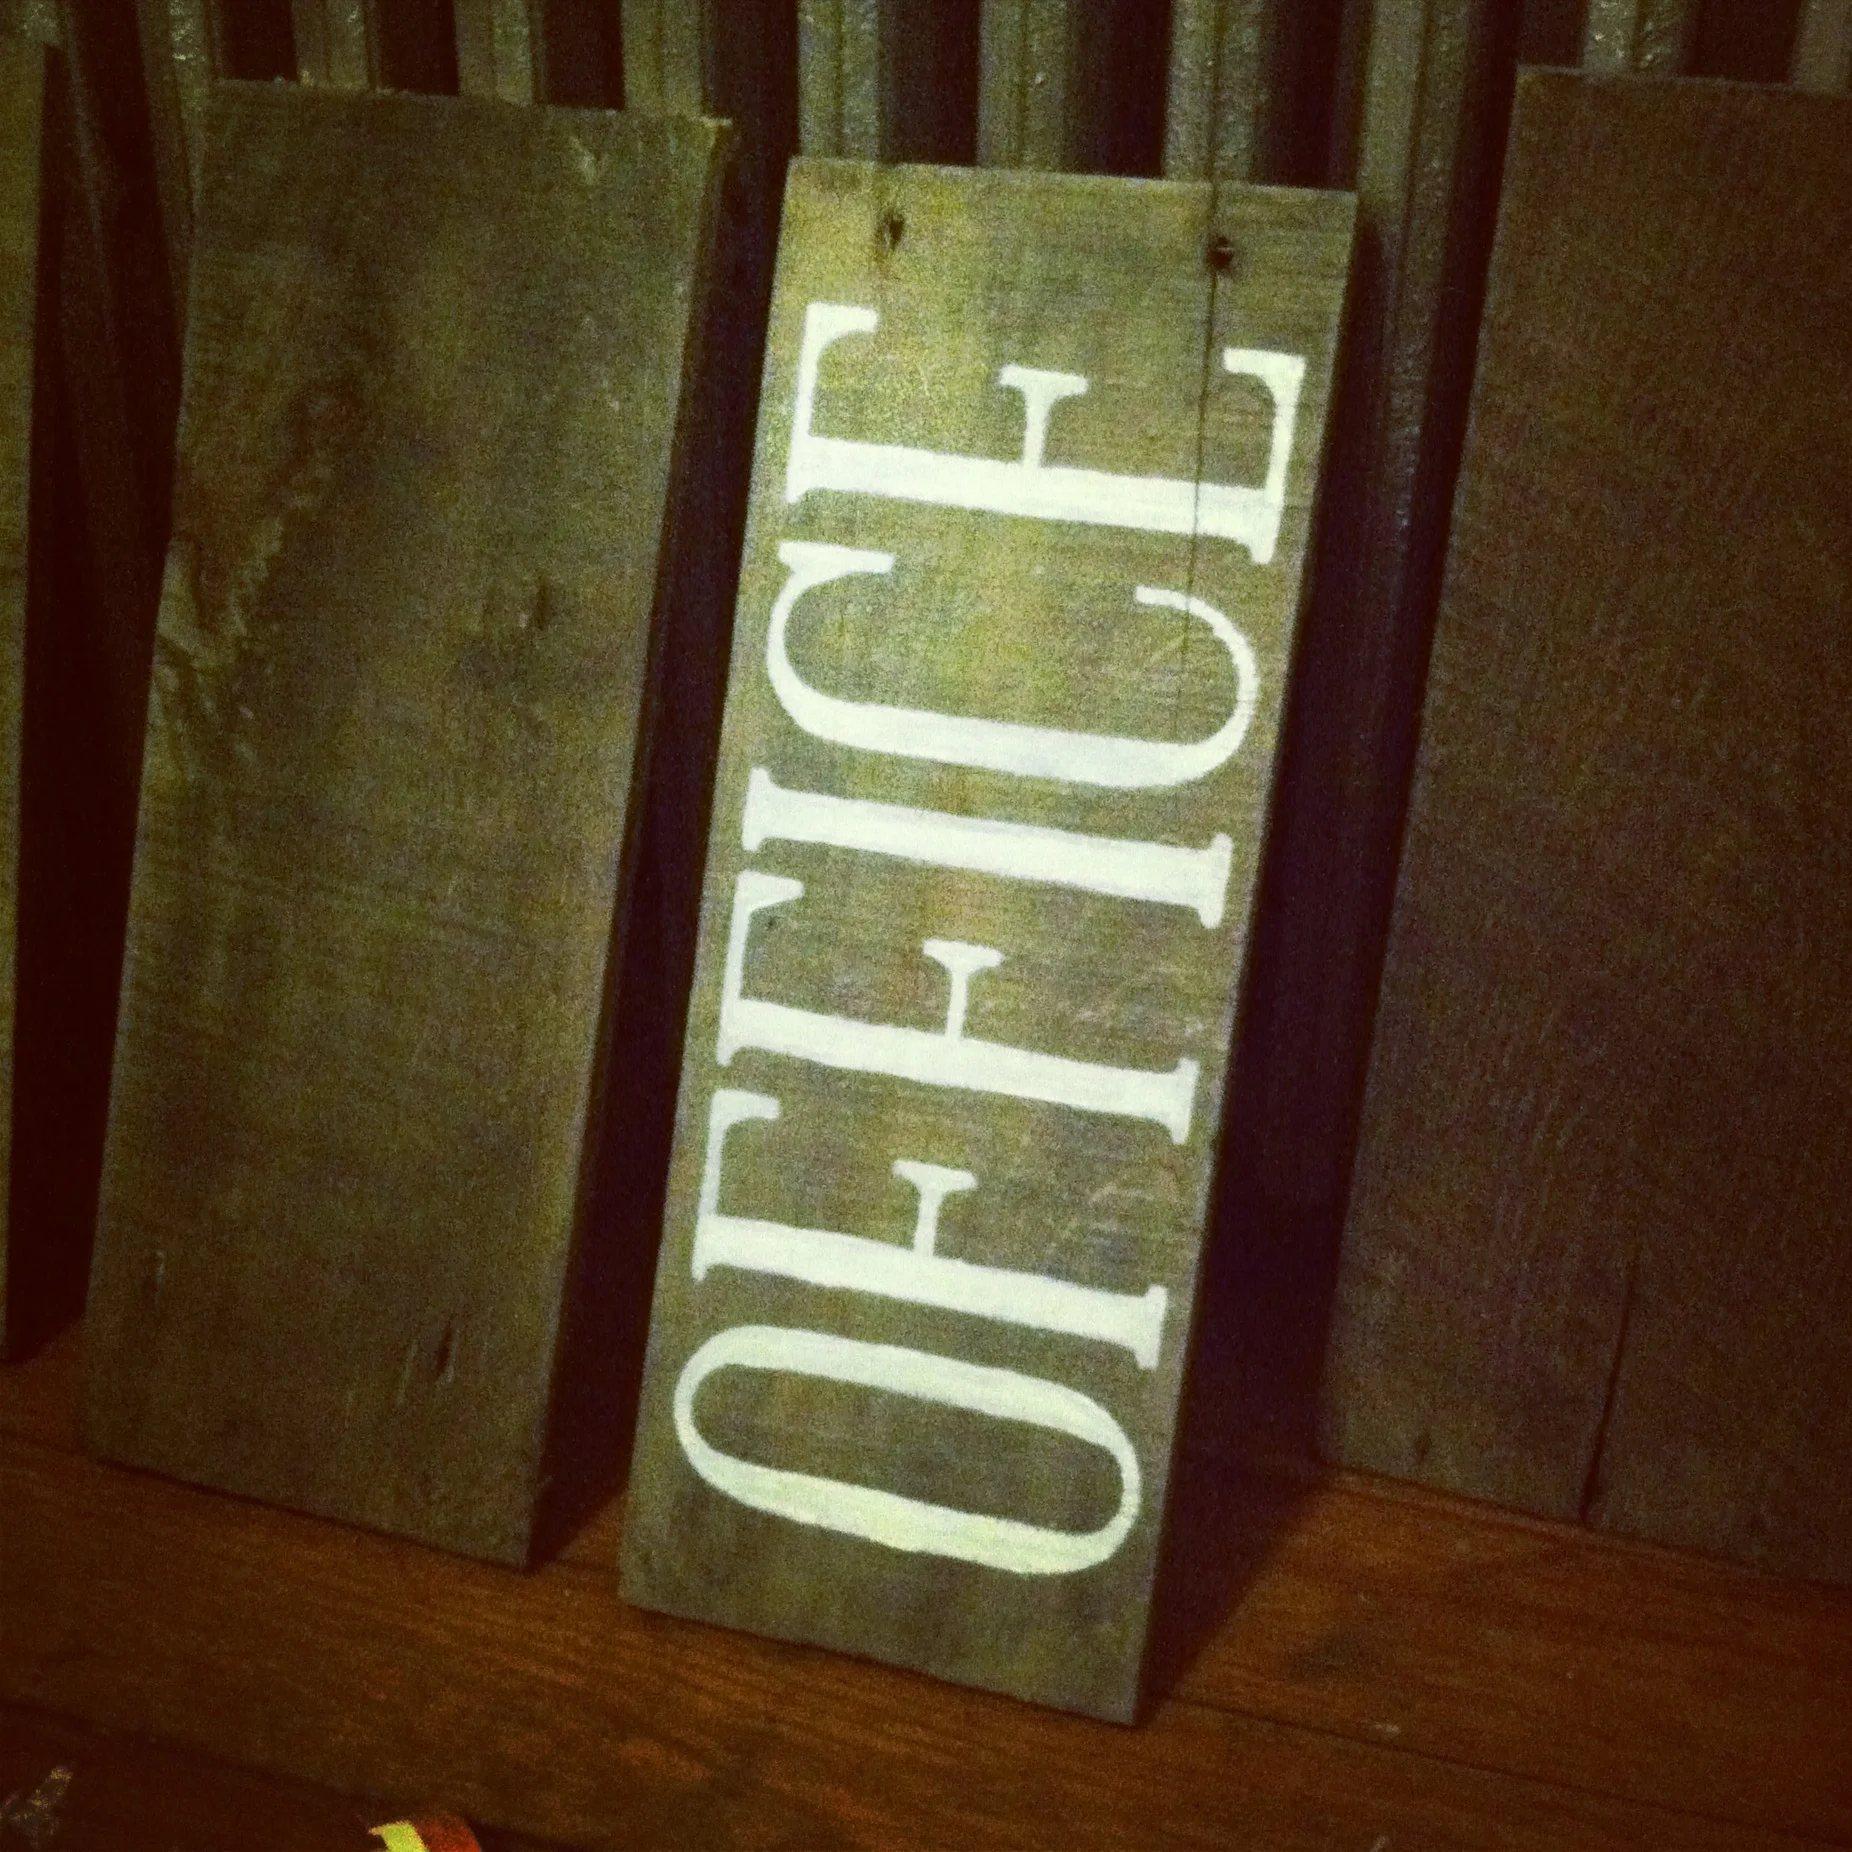
These hand-painted signs were created for Renaissance and are pretty simple to do yourself with only a few materials.
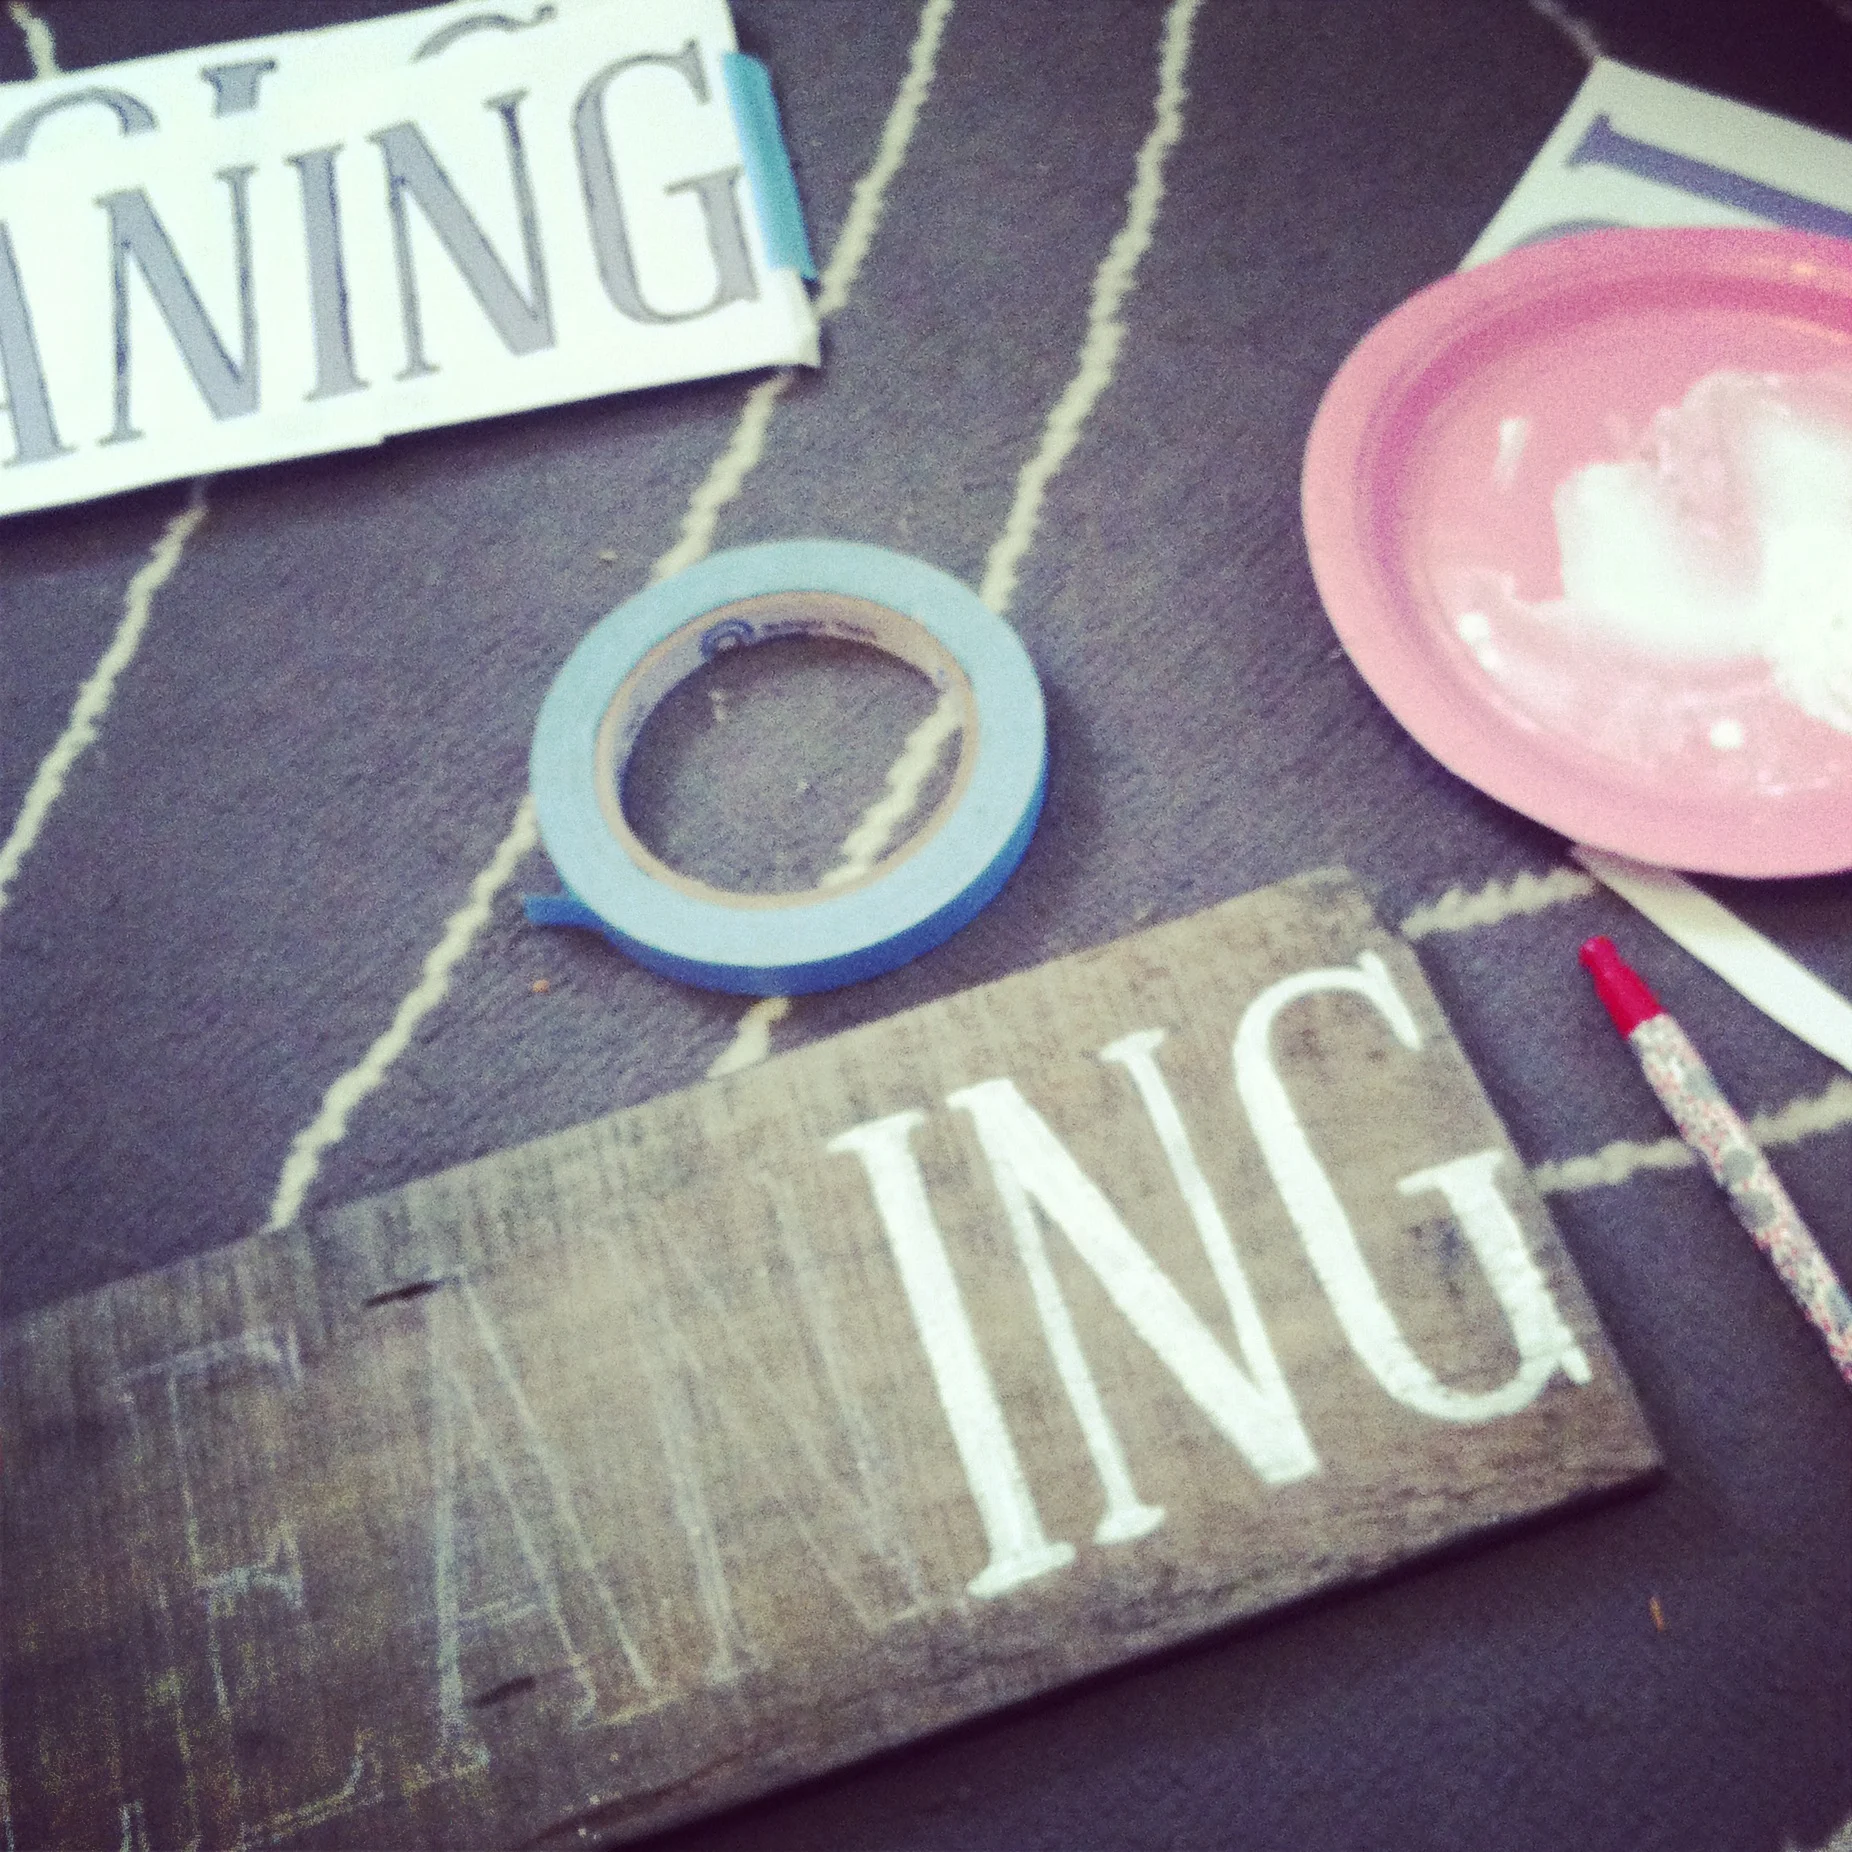
MATERIALS:
- wood, cut to size
- black wood stain (optional)
- print-outs of lettering or design
- white chalk
- paintbrush
- acrylic paint
Here's what I did:
- Since the wood pieces I used were from different sources and had slightly different colorings, I used a black wood stain to make all the pieces unified.
- I printed out the lettering to transfer to the wood by covering the back of the paper with white chalk. Then, I traced the paper printout letters with a ballpoint pen, pressing hard. This left a light chalk outline to help make the painting faster and easier.
- After the design was transferred, it was just a matter of painting all the letters in. I used a couple sizes of brushes and watered down my acrylic paint a tiny bit to help it flow better.
I love how these came out and would definitely recommend trying a similar project out yourself.
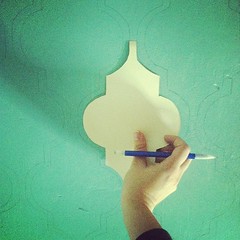
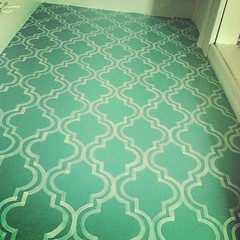
Hand-Painted Wallpaper Pattern
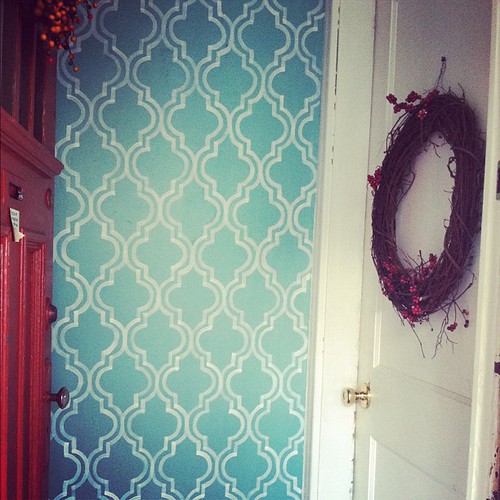
Sometimes I find a simple, repetitive project is just what I need. This patterned wall wasn't very difficult, but the act of repeating the same brush strokes over and over required focus and patience. It's a nice way to balance too much time spent in front of a computer, and now I have a nice accent wall to look at every time I come home. If you'd like to create one of your own you can follow this tutorial.

(detail)
(in progress shots)
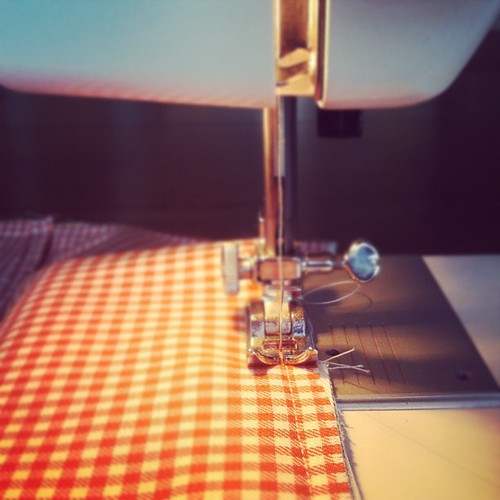
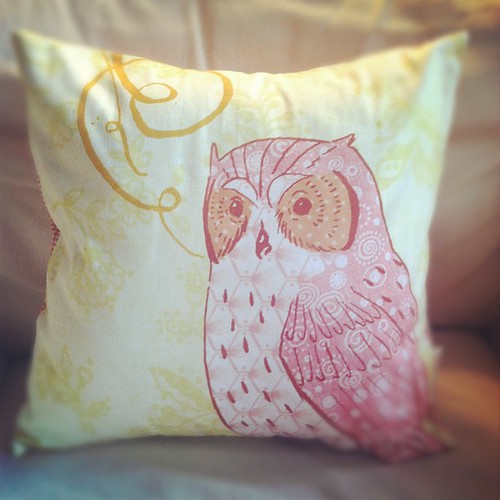
Behind the Scenes: illustrated pillow covers
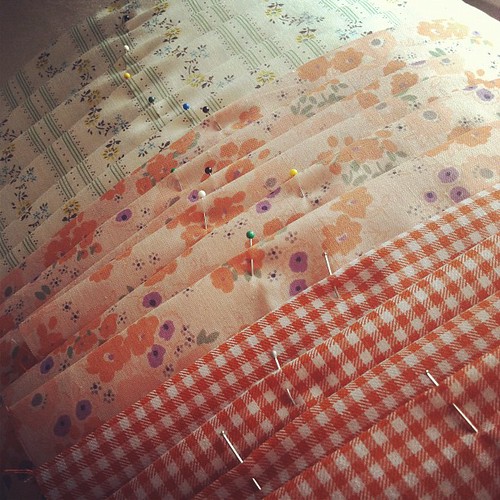
As a budget-conscious artist, I love being able to offer functional works of art in the form of these handmade pillow covers. They're some of my best-sellers, so you all must love them too! Here's a behind the scenes look at the process of making them:
Step one: cut, iron, pin (and sew) fabric for pillow backs.

Step two: cut fabric for pillow fronts.
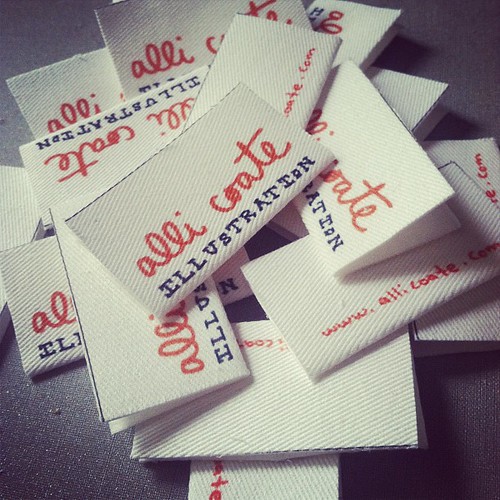
Step three: prep labels.
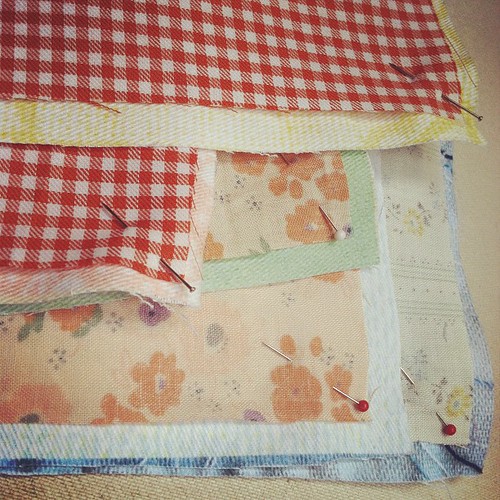
Step four: pin together pillow front and back pieces.
Step five: sew!
The best part is turning the pillow right-side-out. Love that feeling of finishing a project! If you'd like to get a pillow cover of your own, you can pick one out from my etsy shop.
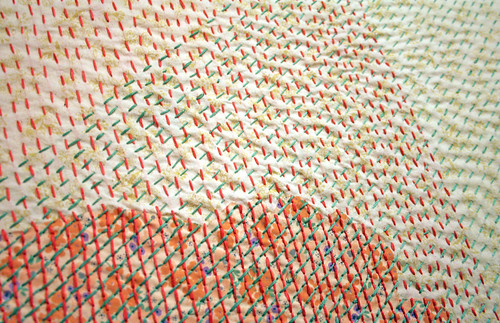
Knit Together
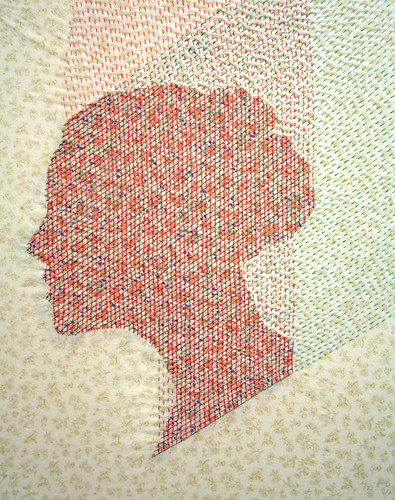
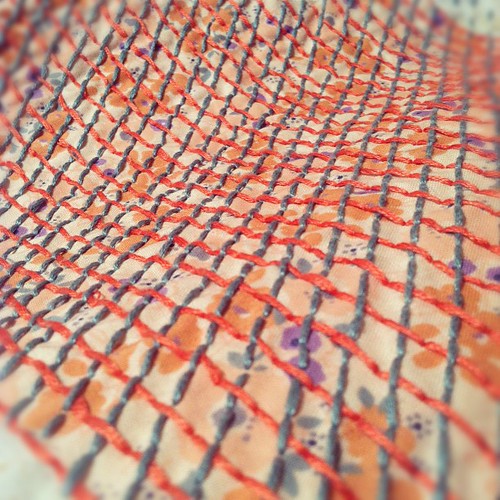
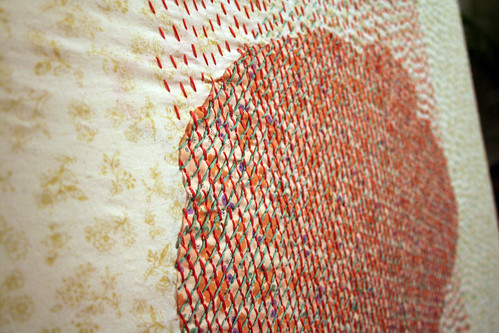
This is what 44 hours of hand-stitching looks like:
To be fair, I'm not totally sure exactly how many hours I put into this piece. But with 55 vertical rows and 77 horizontal rows, at an average of 20 mins spent on each row, 44 hours is my best guess. It began with a silhouette, cut out of one of my favorite floral fabrics.
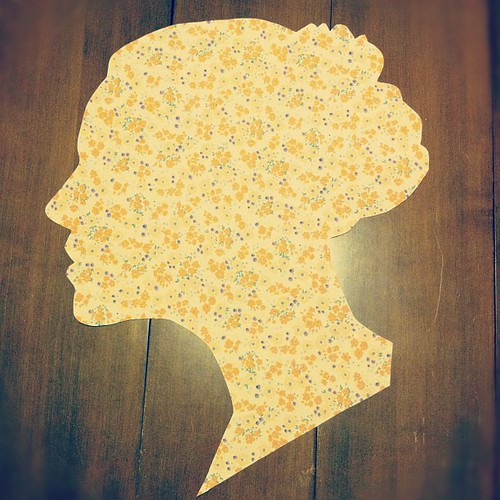
After that, I pulled out my needle and thread and started stitching.
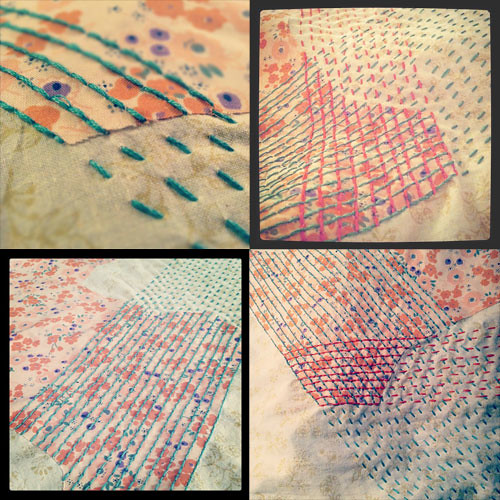
It was important to me that these two intersecting thread systems didn't just lay on top of each other, but instead be woven into each other. It's not quite "knit," of course, but I wanted to convey the same interlocking of materials to form something whole and complete.
Studio tour
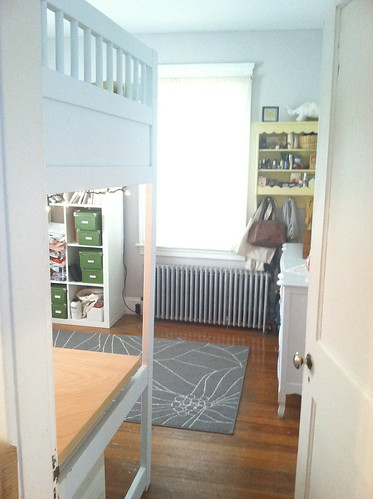
When I moved into my new apartment this June, I had the challenge of condensing all of my belongings from my previous cavernous apartment (where I had a big bedroom and basically two studio/work rooms) to one room with a tiny closet. The simplification was great for me, but it's been a challenge to figure out how to organize my new live/work space. It's probably still a work in progress, but it's at least presentable enough to give you a peek at where I work. Take a look:
Here we are at the entrance to my room- you can see my bed/desk to the left, dresser to the right, and my giant ikea shelves in the back corner of the room. The rug is also from ikea- I think it was something like $20, and I love the flower design.
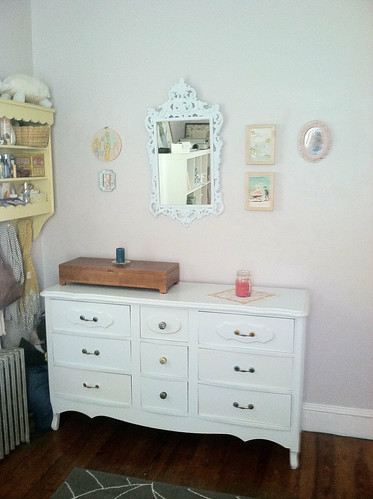
The colors in this photo are a little off; the walls are painted in this hazy purple-pink-grey color that I'm obsessed with. It's the same color that I painted my room in my last place and I still love it. Because the room is a little small, I chose to paint all my furniture white so it didn't end up looking like a cave. This bureau was picked up off the side of the road a few years back, and was pretty dingy. I re-painted it and splurged on some fancy anthropologie drawer pulls, and I love how it looks now. That yellow wall shelf was snagged for $5 at a yard sale in my neighborhood, and I use it to organize my toiletries and knicknacks. My favorites are the hand-stitched stuffed turtle I made for an art installation, a woven totoro reed basket from Bolivia, and a mounted butterfly from a shop in Providence that doesn't exist anymore.
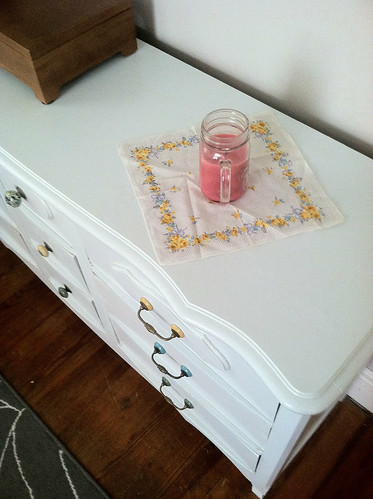
I found this vintage hankie at an antique store (looks like it could use a little ironing!). The brown wooden box is a stationery organizer given to me by a friend that I've been using for my jewelry.
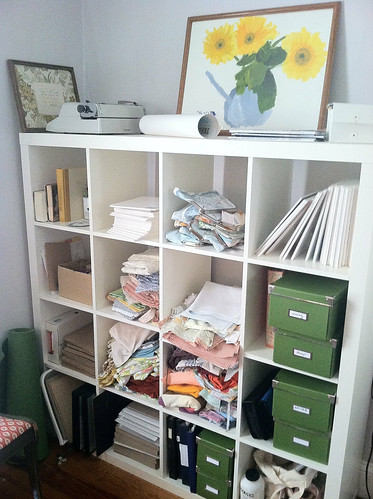
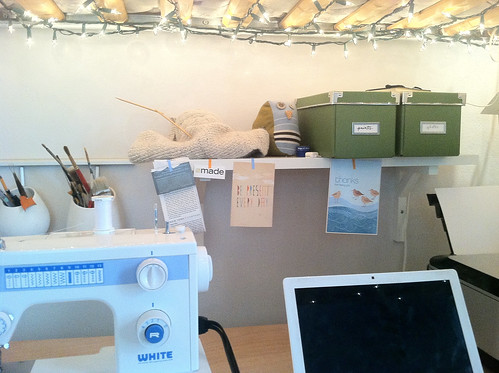
This shelving unit has made it so much easier to organize my art and shop supplies! I keep my fabric, prints, mailing envelopes, sewing supplies, and a bunch of other random things here. On the top I have one of my first paintings (the one of the sunflowers) that I did when I was seven, my beloved cursive typewriter, a print that needs to be framed, and an embroidered piece from a couple years ago.
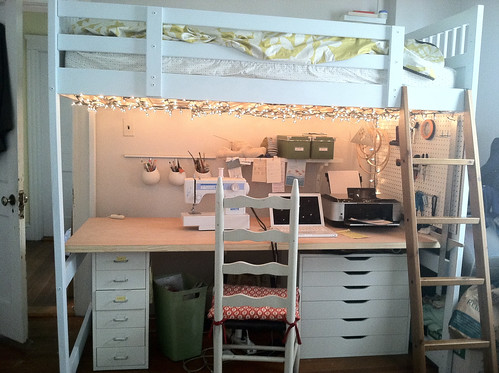
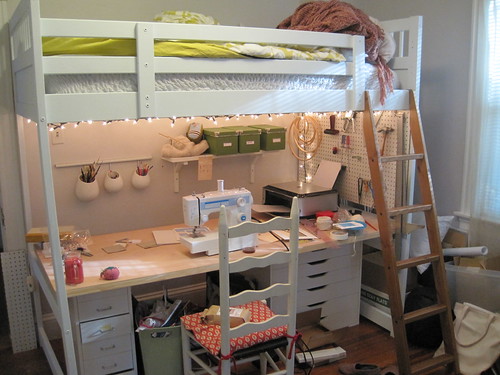
So much of my furniture is from ikea! The loft bed frame is actually "vintage" ikea; bought it off craigslist and painted it white. I attached a couple strings of white lights to the wooden slats on the underside of the bed that light up the desk space. The lights are plugged in to a dimmer switch (also from ikea) that I can easily switch on and off. Before that I was crawling underneath the desk to unplug them, not a great situation. To the right of the bed and desk is about a foot and a half of space that works pretty conveniently as extra storage space since my closet is super tiny. It's thankfully pretty inconspicuous (except that in this picture it kind of looks like things are starting to pour out of it - I'll need to work on that!). The desk surface is a very heavy blank door that I bought at home depot. I used two ikea filing cabinets to prop up the desk; the one on the right is great for storing paper and projects. Unfortunately they're not the same height, so I ended up using some wooden blocks to level it out.
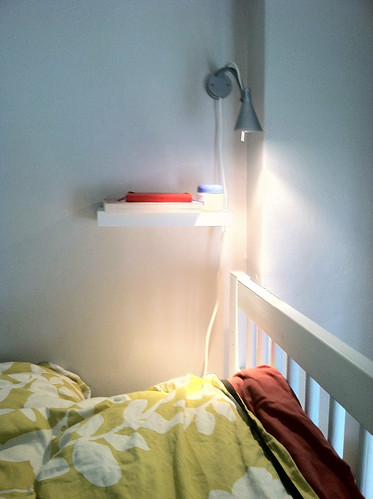
I recently installed this little shelf and lamp by my bed; before this I would stick my glasses and books in between my mattress and bed frame. (Not smart.)
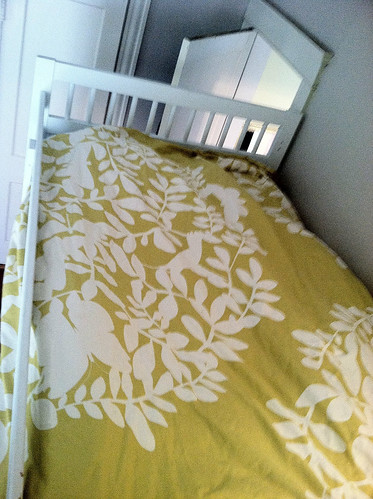
I love my duvet cover! It's hard to see from this angle, but interspersed in the branches are birds and butterflies.
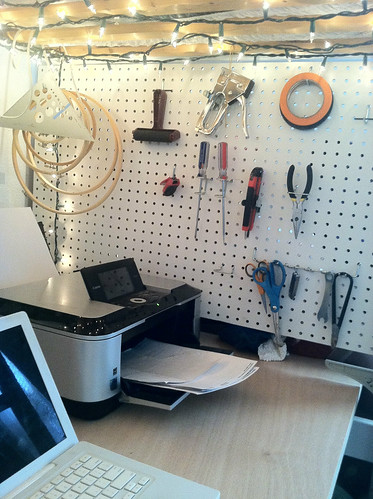
This pegboard keeps all my most-used tools in easy reach. I fastened it to the bed frame and it does double-duty to block off that storage area.
These two storage areas help keep my work surface free of clutter; the hanging ceramic cups keep my painting and drawing tools organized, and a shelf with a couple boxes keeps the rest of the mess off my desk.
Hope you enjoyed my little studio tour!
Vintage farm wedding
This summer I had the pleasure of working with a dear friend on some projects for her wedding reception. I used vintage illustrations, hand-lettering, and a palette of antique-hued fabrics to create table numbers, signs, and a hand-made photobooth. Take a look!
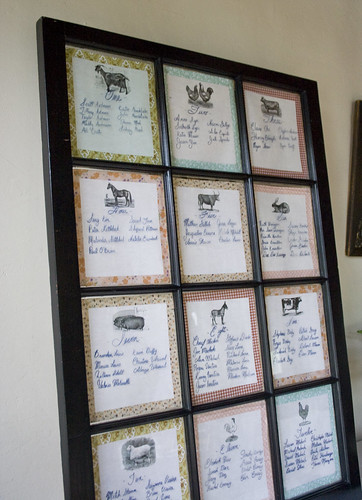
For the seating chart, we used a 12 paned window frame that belonged to the bride - how perfect that the guests fit at 12 tables! Paper backings were attached to the back side of each pane, and the bride wrote on the front of each pane with a glass marker.

I designed the paper backings with a vintage farm animal illustrations to identify each table, and borders of my favorite vintage-inspired fabric patterns.
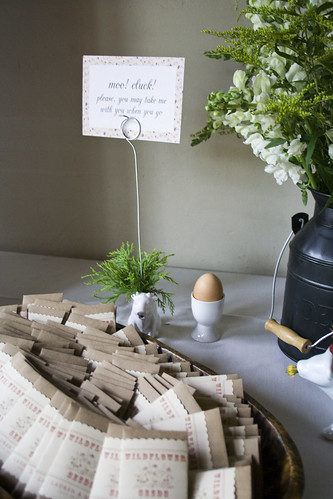
This sign invited guests to bring one of the cow creamers or egg cups that decorated the reception home with them. Another friend of the bride created sweetly packaged wildflower seed favors.
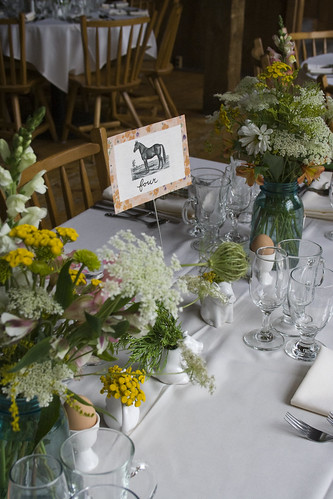
Each table was marked with a card featuring a vintage farm animal illustration and a patterned border that corresponded with the table seating chart. The flower arrangements were created by the bride's mother- aren't they beautiful?
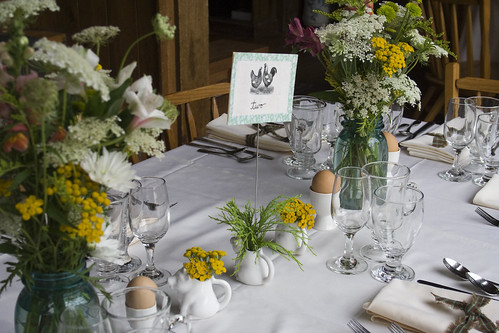
White ceramic cow creamers worked perfectly to display the table cards and hold tiny wildflower blossoms. Brown eggs in little egg cups also dotted the tables - the bride and groom are both chefs so baking and cooking details were used throughout the reception.

I can't get over how lovely these flower arrangements were! The colors tied in perfectly.
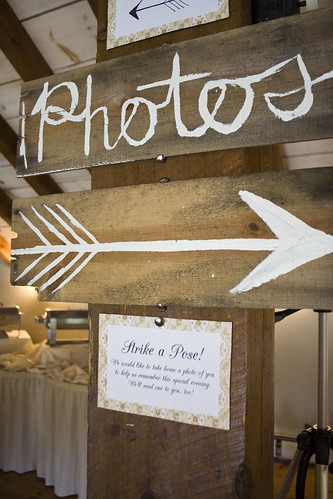
More hand painted signs and printed cards helped guests find their way around the multi-leveled barn that housed the reception. The wooden pieces for these signs were salvaged from old crates and boxes.
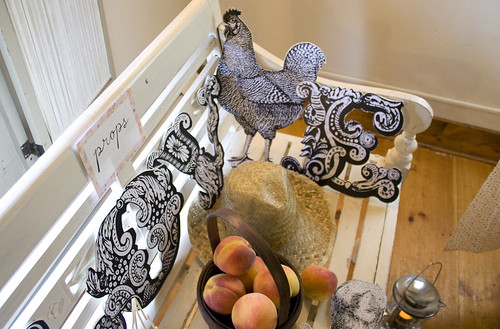
Do you recognize this chicken? Some of the animals from the table cards made their way into our hand-made photobooth. Large printouts of chickens, rabbits, and "L-O-V-E" letters were mounted on sturdy foamcore. Other props included old-fashioned lanterns, a wooden wheelbarrow, hats, and baskets of peaches. The backdrop was made with one of the fabrics that was used on the table number borders.
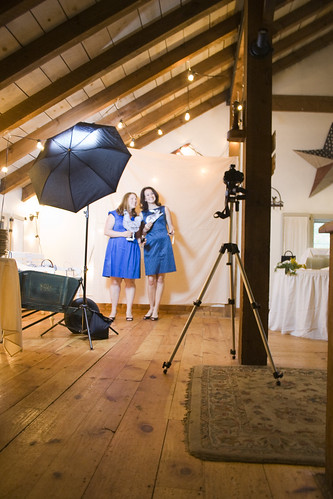
Two guests gave the photobooth a try - hooray, it works!
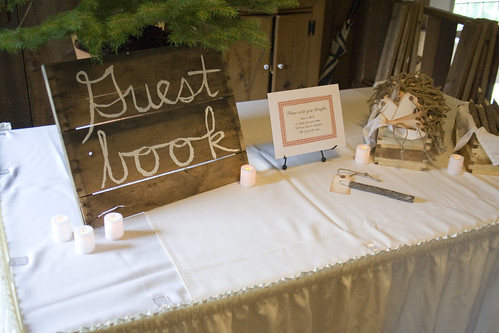
The groom had this great idea for an unconventional guest book; guests were invited to write on a tag and hang it on a tiny Christmas tree from the couple's home. By the end of the night the tree was filled with well-wishes and love from their friends and family.
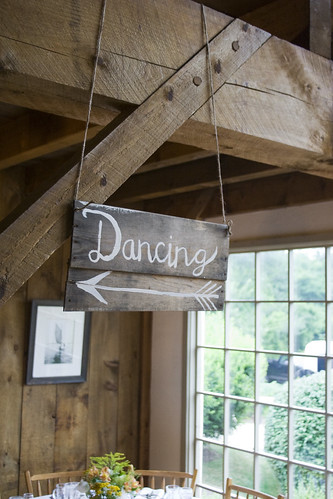
This sign pointed up the stairs from the lower level of the barn, where dinner was served, to the dance floor on the upper level.
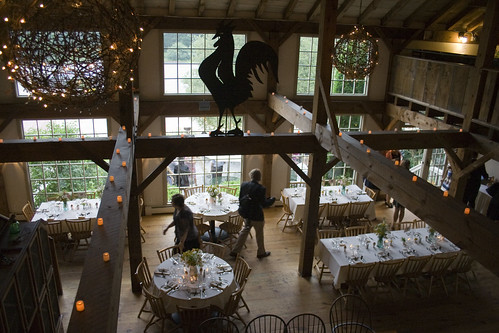
Here's an overview of the space from the loft area. The entire reception was lovingly decorated by friends and family of the couple. It was a beautiful celebration of a beautiful couple. Congrats!
New workspace
It's still a work in progress - this was taken about a week ago, it's a bit tidier now - but this is where I've set up shop as of this month. It's a much smaller space than I've had before, but it's been fun figuring out how to make it all fit. Still have a couple more things to do - paint that ladder is one of them. When it's finished I'll give you a closer look.