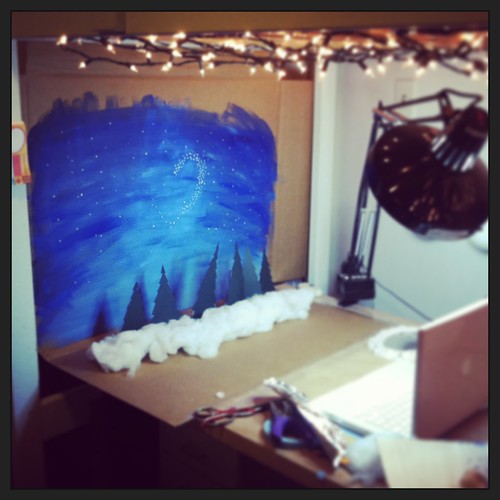
A week or so ago, I set about creating something special for PeaceLove to share with their online community as a holiday greeting. I've long been an admirer of stop motion animation, but had never really tried it myself. Thanks to some great friends at risd who let me tag along with them to the animation studios, I have a basic understanding of how it works. After sketching up some quick thumbnails to figure out how I wanted everything to look, I grabbed some paper, paint, and cotton and got to work.
I started out with a test run to make sure everything would work the way I wanted it to. I used a program called FrameByFrame that helped a lot with figuring out movement; it lets you see the previous frame overlayed with the current frame. This makes it really easy to see how much you're moving or changing each object with each frame. Thankfully everything worked the way it was supposed to, but the drawback was that FrameByFrame uses my built in camera so the image quality left a lot to be desired. Still, it was good practice and helped me plan the final version. (You can watch my test-run here)
For take two, I graduated to my DSLR camera for better image quality. I basically had to guess how much to move everything for each shot, but I had the basic idea of what I needed to do from my test animation. I also used the self-timer feature since I was working in low light; otherwise I might have accidentally moved the camera and made the photo blurry. Speaking of lighting, my "built-in" Christmas lights helped give some softer light, in addition to my nice bright worklamp. (You can see more of my lighting and studio setup in my studio tour.)
As you can see from this revealing behind-the-scenes shot, I didn't use any fancy tools! You can probably tell from the video that the backdrop was made from cardboard. The trees were cut from paper and taped to nail polish bottles to keep them standing. I needed a little more height, and a box of aluminum foil was the perfect size. The banners were taped to paint brushes, which were jammed into containers filled with tissue paper to keep them upright. Hopefully this doesn't take away from the "magic" of the illusion for you, but I really wanted to show that you can do a lot with what you already have around the house. The trick is keeping it hidden in the animation!
Thanks for reading, and (belatedly) happy holidays!


