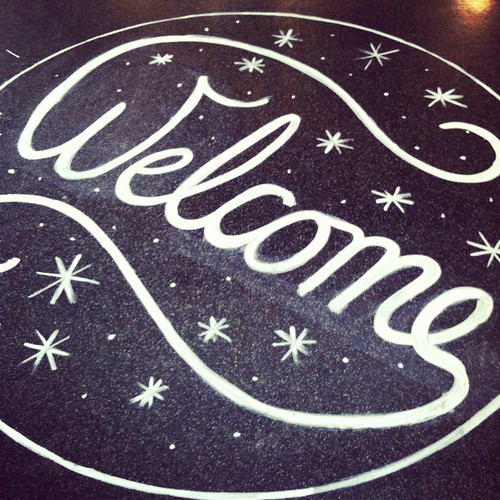
For signage at our most recent event at REN, I decided to try something new and paint on the floor. First of all, painting on the floor is really fun and I highly recommend it (as long as you test in an inconspicuous area first!). I used a mixture of about 50% acrylic paint, 50% liquid dish soap to make it easier to wash off. The thinner consistency also made it easier to paint with - a nice bonus.
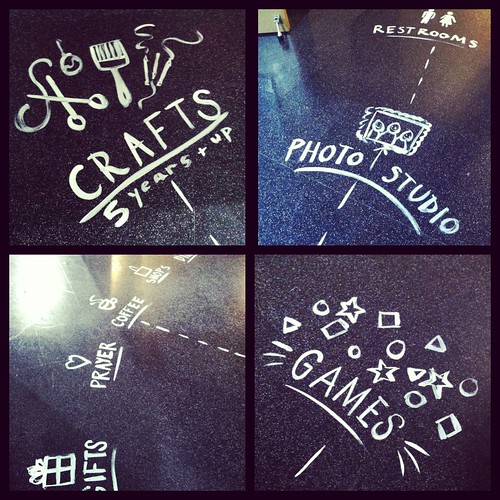
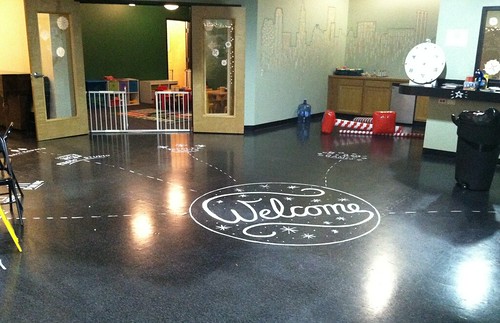
After lettering the large circle (approx. 5ft diameter), I painted arrows, illustrations, and lettering that explained what each area was. Below is a photo of the whole lobby area (this was mid-setup, so don't mind the random things scattered around!).
There were a lot of people walking around that night, so by the end of the event the paint was looking a little worn. It was all still legible, though, and I actually like the worn-in look.
If you're interested in seeing what the rest of the event looked like, you can watch a short video here.
A week or so ago, I set about creating something special for PeaceLove to share with their online community as a holiday greeting. I've long been an admirer of stop motion animation, but had never really tried it myself. Thanks to some great friends at risd who let me tag along with them to the animation studios, I have a basic understanding of how it works. After sketching up some quick thumbnails to figure out how I wanted everything to look, I grabbed some paper, paint, and cotton and got to work.
I started out with a test run to make sure everything would work the way I wanted it to. I used a program called FrameByFrame that helped a lot with figuring out movement; it lets you see the previous frame overlayed with the current frame. This makes it really easy to see how much you're moving or changing each object with each frame. Thankfully everything worked the way it was supposed to, but the drawback was that FrameByFrame uses my built in camera so the image quality left a lot to be desired. Still, it was good practice and helped me plan the final version. (You can watch my test-run here)
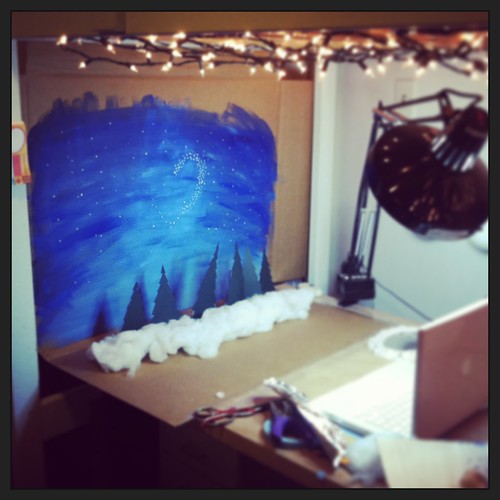
For take two, I graduated to my DSLR camera for better image quality. I basically had to guess how much to move everything for each shot, but I had the basic idea of what I needed to do from my test animation. I also used the self-timer feature since I was working in low light; otherwise I might have accidentally moved the camera and made the photo blurry. Speaking of lighting, my "built-in" Christmas lights helped give some softer light, in addition to my nice bright worklamp. (You can see more of my lighting and studio setup in my studio tour.)
As you can see from this revealing behind-the-scenes shot, I didn't use any fancy tools! You can probably tell from the video that the backdrop was made from cardboard. The trees were cut from paper and taped to nail polish bottles to keep them standing. I needed a little more height, and a box of aluminum foil was the perfect size. The banners were taped to paint brushes, which were jammed into containers filled with tissue paper to keep them upright. Hopefully this doesn't take away from the "magic" of the illusion for you, but I really wanted to show that you can do a lot with what you already have around the house. The trick is keeping it hidden in the animation!
Thanks for reading, and (belatedly) happy holidays!
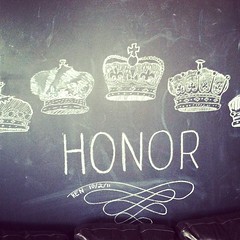
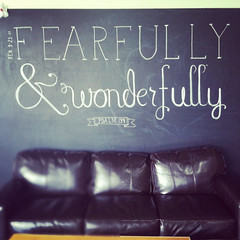
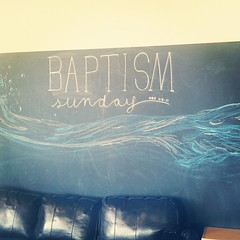
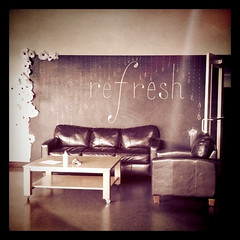
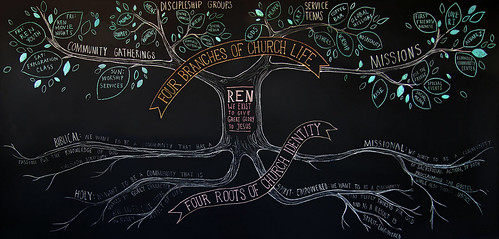
As a member of the art team at Renaissance Church, I've had the joy of working on lots of amazing projects. One of the longest running series (and also the most temporary) has been these chalkboard murals, which typically lasted only a week. Corresponding with whatever was going on that Sunday, the type and illustrations carried a simple message that would soon be wiped away to make room for a new one. Several of of these murals are collaborations - thank you to the friends who lent a hand.
(The latest mural, showing the core beliefs and structure of Ren, stretches all the way across the chalkboard wall.)
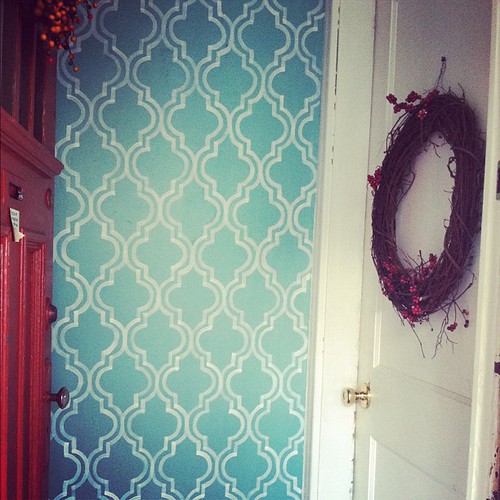
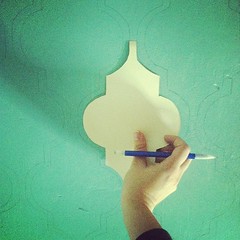
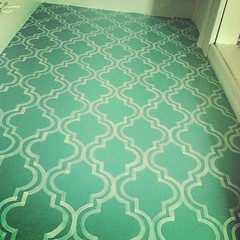
Sometimes I find a simple, repetitive project is just what I need. This patterned wall wasn't very difficult, but the act of repeating the same brush strokes over and over required focus and patience. It's a nice way to balance too much time spent in front of a computer, and now I have a nice accent wall to look at every time I come home. If you'd like to create one of your own you can follow this tutorial.
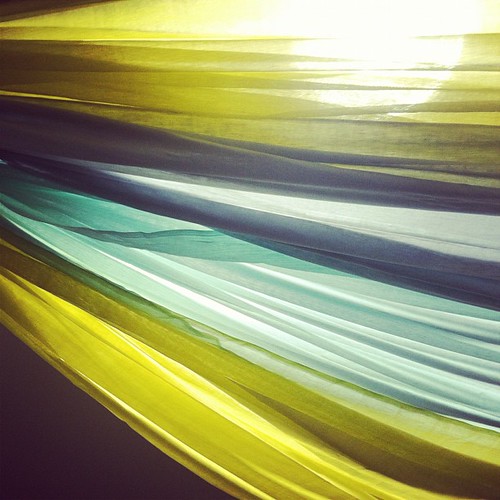
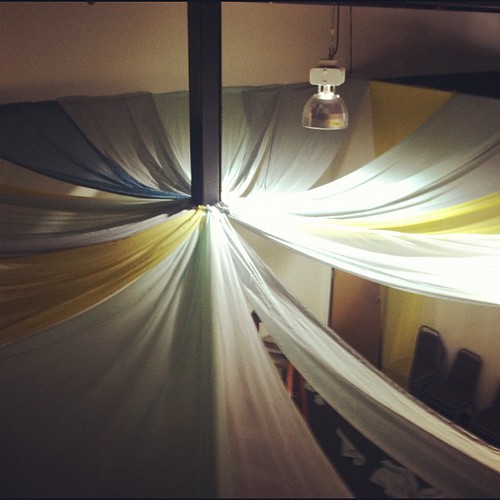
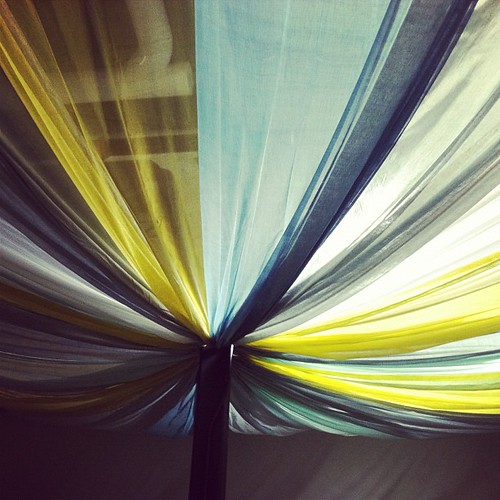
I spent a couple days with my friend Stephanie hanging fabric in one of the kids' classrooms at Renaissance to create a fun fabric canopy. We used some lightweight gauzy fabrics in light colors to to make the tall, industrial space feel a little cozier while still letting some light through. Here are some in-progress shots, with a finished shot last:
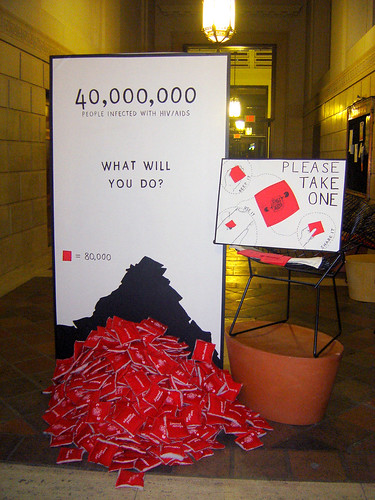
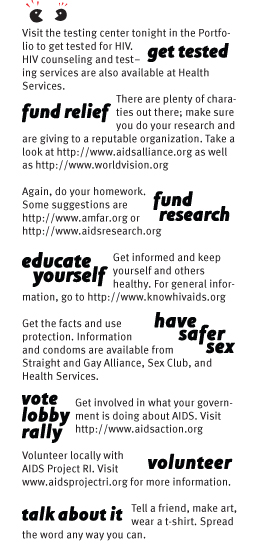
Some of the most memorable experiences of my time at RISD were the collaborative projects that I was fortunate enough to be involved in. I worked with a group of students to run a benefit for 2006's World AIDS Day at RISD. My main portion was to create an interactive art installation for the event. The main goal of the installation project was to communicate the scale of the world epidemic, but without making the viewer feel completely helpless.
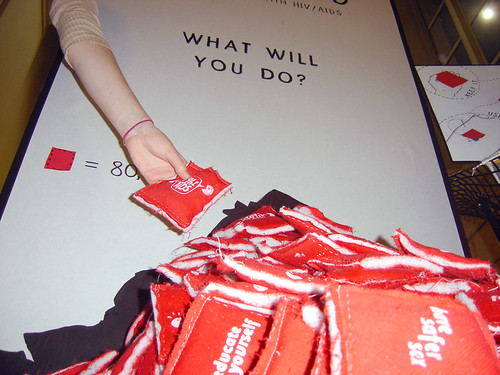
The structural aspect of the installation was a large freestanding panel that was attention-grabbing without being overwhelming. It presented the information simply: "40,000,000 people infected with HIV/AIDS. What will you do?" At the base of the panel was a pile of little pillows. Each pillow was printed with the "Fight Aids" logo on one side and a practical way to help fight HIV/AIDS on the other. The tips were: get tested, fund relief, fund research, educate yourself, have safer sex, vote-lobby-rally, volunteer, and talk about it. A handout accompanying the installation provided further details into each of these tips. A poster (looking silly propped up on a chair, but doing its job anyhow!) suggested ways to use the fabric pillows.
The pillows were arranged in a pile representing the problem that would diminish as each person took one of the tips away. I painted the shadow of the pile onto the panel behind it, so that as the pile grew smaller and smaller over the week there was a way to measure the progress against the original pile. The installation remained in the 15 West lobby for the week following the event, and served as a prompt and reminder for student housing occupants, staff, RISD library users, and Portfolio Cafe visitors.
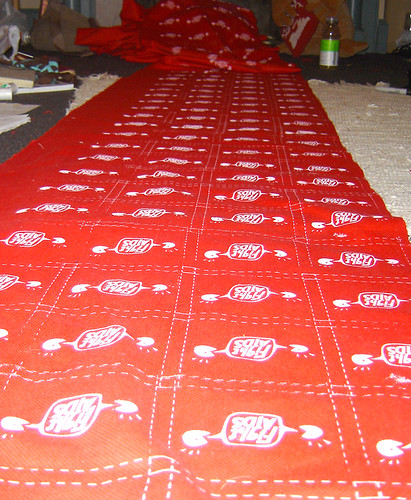
Yards and yards and yards of silkscreened fabric that could not have come into existence without the help of Chris Tolles and Will Reeves!
The task of assembling all the little pillows was undertaken by apparel students spearheaded by super-friend Andi Archer!
I'm selling my turtle and squirrel from the window installation on Etsy! I wish I could keep them, but it will be happy to send them off into the world.
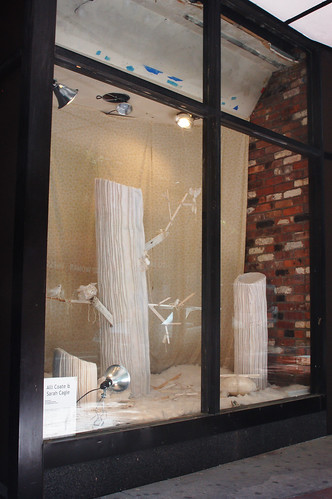
Finally, pretty pictures of the window installation!! Big thanks to Nathan, Chris, and Emma for all your helps.
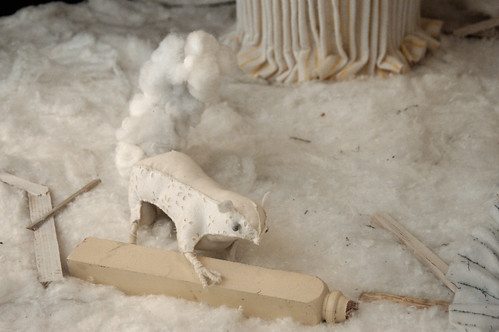
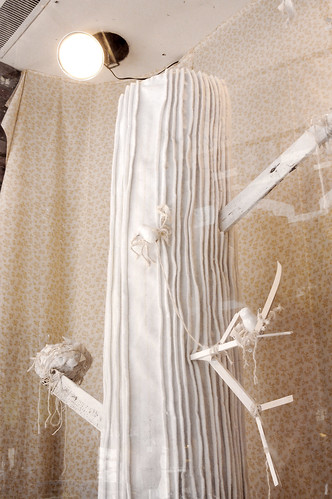
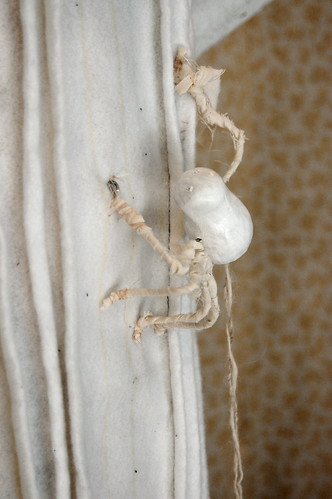
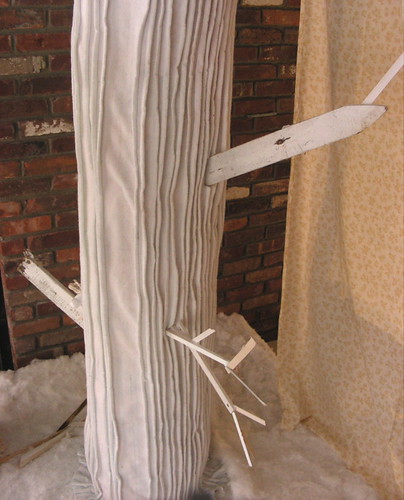
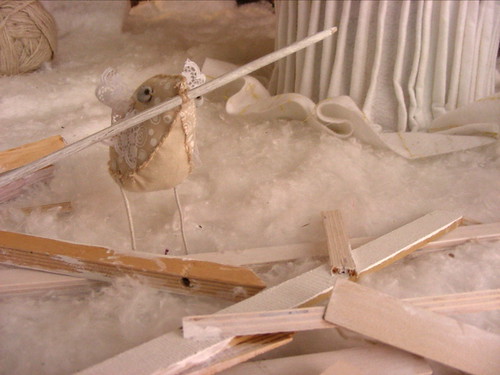
This installation was part of Providence Art Windows Spring '08, on view at 191 Westminster St. Providence from March 20th through June 13th. I collaborated with textile artist Sarah Cagle to create this vignette of a stripped forest being rebuilt by its inhabitants.
For more pictures, see my photostream. Some of the pieces from this installation will be available at my etsy store soon!
After two days without sleep, it is such a relief to post these photos and tell you all that we finished installing our piece for Providence Art Windows! The window is located at 191 Westminster St., and our opening is Thursday night from 6-8 at Design Within Reach, 210 Westminster St. (diagonally across the street from our window). The exhibition lasts until June 13, 2008- thank goodness! It was such a big project that it would be painful to have to take it down after only one week or something. We're really happy with how it turned out. These photos were taken earlier on in the day, so they don't show the completed setup. Please stop by and take a look!
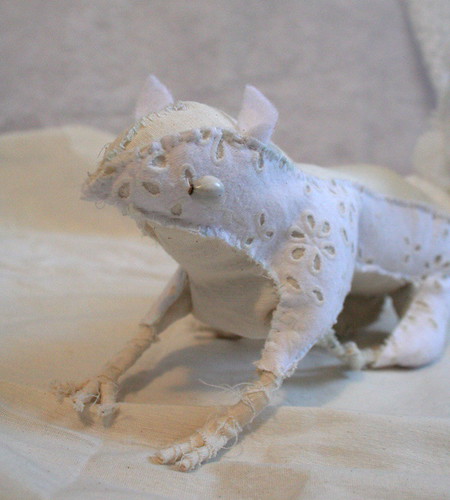
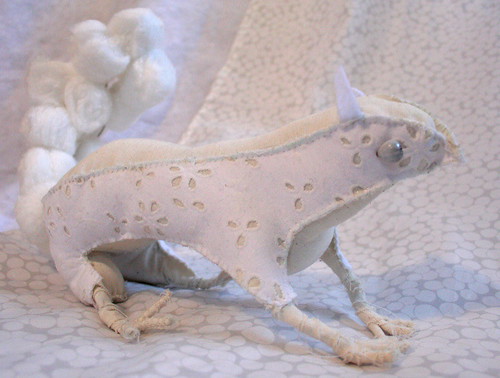
Another little fabric creature for Providence Art Windows! This squirrel is made from a wire armature, fiberfill, muslin, eyelet fabric from a bathing suit, and cotton balls. 100% sewn by hand.